After we got Windows 10 ISO image from Microsoft, we will now create bootable Windows To Go installation on MicroSD for our Steam Deck.
For this guide, you will need access to Windows PC, Windows 10 ISO file – you can download it following tutorial here, and a solid speed MicroSD card.
PC you are going to use for this needs to have SD card reader – separate, or as part of the machine.
After you are done with creation of MicroSD card – you can look at this guide and start at the shutdown step – you will put MicroSD card you created in this guide in your Steam Deck after you shut it down, and then boot from it from Boot Manager.
At last, here is more info from Microsoft on the topic of Windows to Go – https://learn.microsoft.com/en-us/windows/deployment/planning/windows-to-go-overview
Let’s get started…
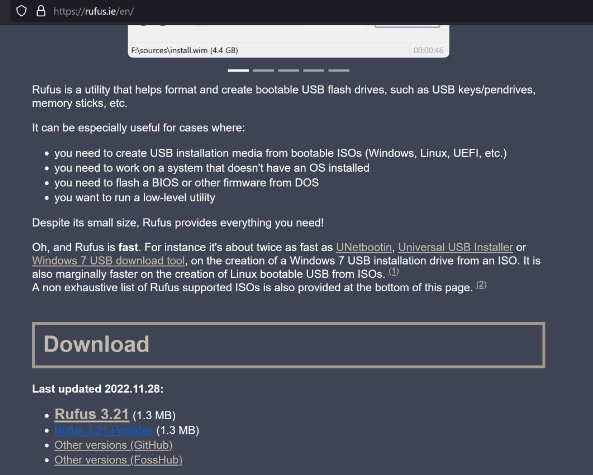
First, we will download Rufus – https://rufus.ie/en/ I will get portable edition and put it in Downloads folder where I already have Windows 10 latest ISO downloaded. This will not work with Windows 10 ISO downloaded from Windows Media Creation Tool. So, to see how to download Windows 10 ISO directly, please look for instructions here.
It is also recommended to have certified USB stick for this procedure – but these are hard to find in 2023 and manufacturers don’t do them – so, we will do this with MicroSD card that we can just put into our Steam Deck later.
Also, be aware that Windows To Go does not support Feature Updates.
Ok, back to business – Download RUFUS
I have Rufus Portable, Windows 10 22H2 64bit ISO installation and 128GB MicroSD (16GB should be fine, but again, you can’t then put anything on it)
Speeds
I tested process of creation Windows To Go with various USB sticks and MicroSD cards
USB sticks were 16 – 32GB size, all declarative USB 3.0, but it took them for more than hour to make WIndows To GO – worst I had was 4 hours – and then I canceled it because it didn’t finish.
MicroSD also had various results – fastest I had was Kingston 128GB V30 SDXC1 – which finished the process in 13 minutes

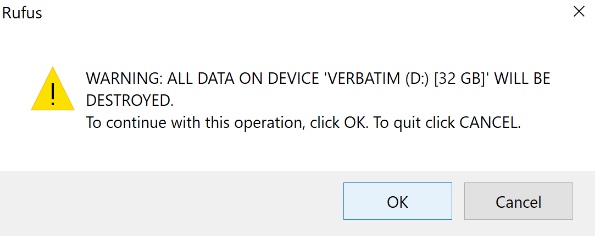
Be sure that you don’t have important data on your MicroSD – it will be erased in this process!!!
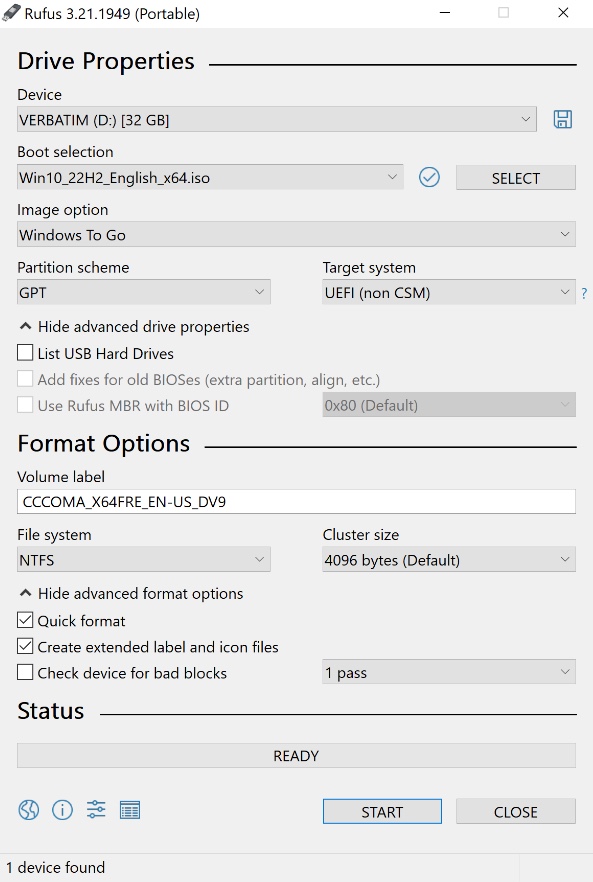
We will now open Rufus
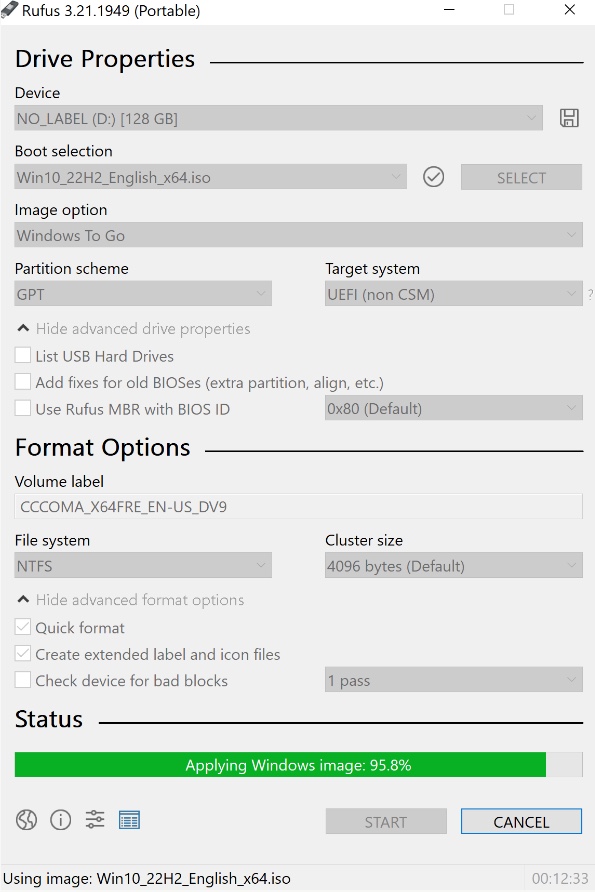
For a Device I will select my MicroSD (USB stick is depicted below, you can ignore that – I have sam tutorial on my other blog)
under Boot selection I will select my Windows 10 22H2 x64 ISO installation
Image option is very important – select Windows To Go
I will select GPT with UEFI for partition scheme and Target system – this is what Steam Deck support and it will boot from that.
File system should be NTFS
Click on Start
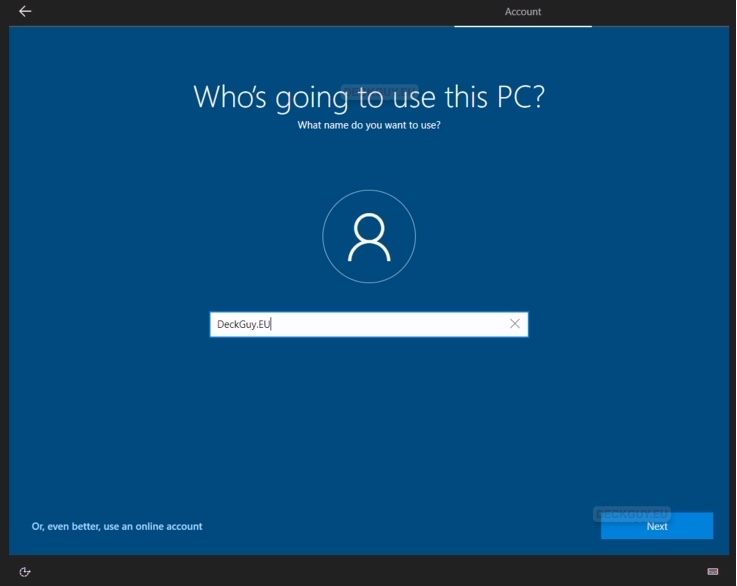
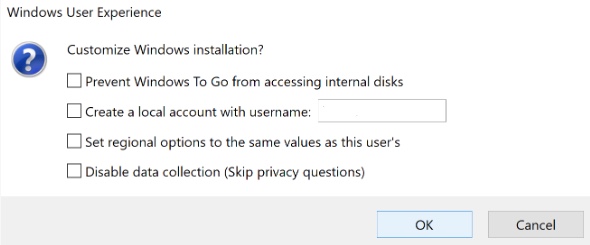
After you press start, you will be asked what type of Windows you want – select Windows for which you have license – in my case that is Windows 10 Pro

I will select Vanilla install – OK, you can customize these options as you like.
Warning that your data will be deleted – this is last time you can quit if you have something important on your USB
Process will start… It will depend on the USB or MicroSD you have – it maybe quickly over, it may take hour or couple of hours…
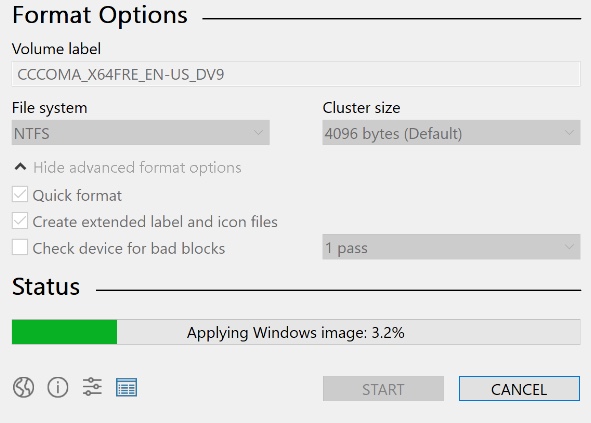
With MicroSD card I mentioned above I managed to finish this in 13 minutes
That is it, you should now have USB, MicroSD ready for your Steam Deck!!!

Windows To Go I created in tutorial above is working – it is tried and tested. With Windows To Go be sure to have MicroSD device with good specs or the install will take hours.
After you are done with creation of MicroSD card – you can look at this guide and start at the shutdown step – you will put MicroSD card you created in this guide in your Steam Deck after you shut it down, and then boot from it from Boot Manager.
You probably won’t need to expand your partition since MicroSD created this way will use whole MicoSD space.
Enjoy your Windows experience on Steam Deck!