
We learned how to buy a game from Steam Store – now we need to install it.
You can install game from many other stores, not just the Steam one – but in this short tutorial – we will cover installation from Steam store. We will also go through some details in menus you get after you press Options button on selected game.
In the first gaming tutorial we went through a process of buying game on Steam Store.
In case you want to learn more about storage on your Steam Deck, and other system features of Steam Deck please have a look at these two in-depth tutorials of every option inside Steam Deck (Gaming Mode)
Ok, let’s now install the game we bought in our first step.
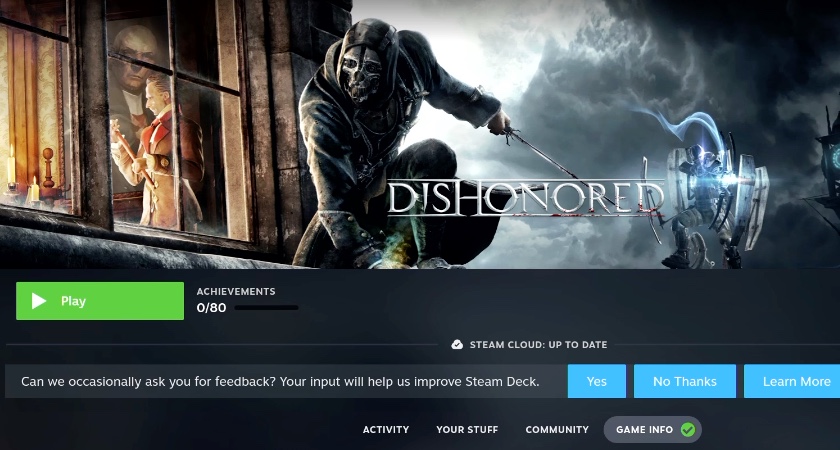
Game is on our home screen on Steam Deck – we will be installing Dishonored
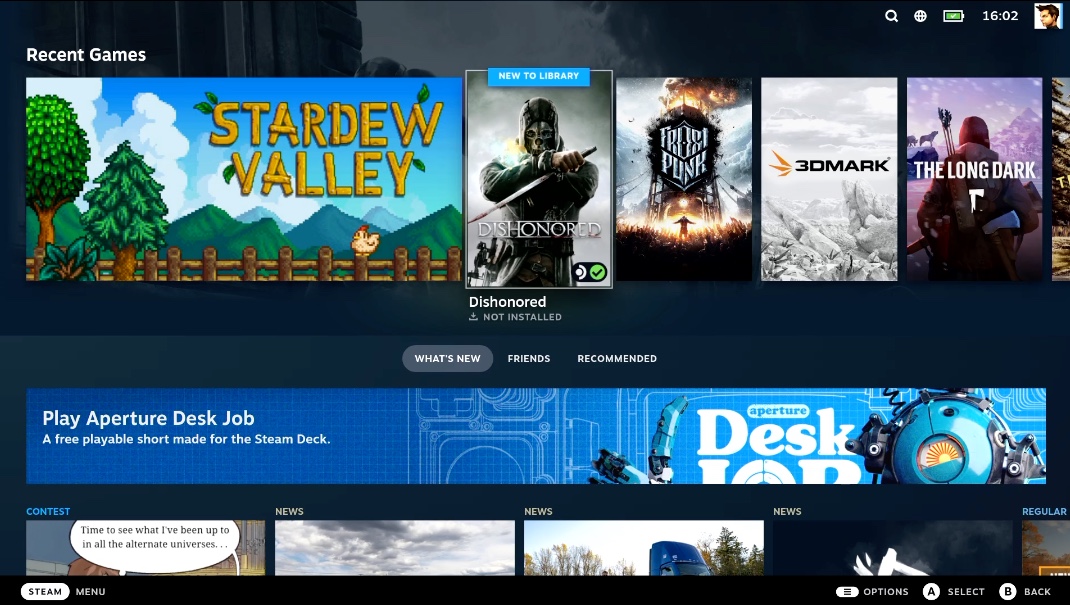
Before Installation – click on Game you wish to install and press Options/Menu button
Before we press button A on a game, let’s quickly press Options button to see what we can get in a menu on a game we selected. There are quite a few options you can adjust for your game.
We WON’T install game through this menu – although we could. We will just go through options we have on this menu. So, we can Install game. We can Add it to favorites.
Add to – gives us an option to create New Collection and add this game to that collection. Collections are a way to organize your games into something that is recognisable to you.
Under Manage we have an option to Hide this game from Home.
Under Developer options we have two choices – to Delete Proton Files or Clear Selected Controller Layout – both very useful options we will discuss more in depth some other time.
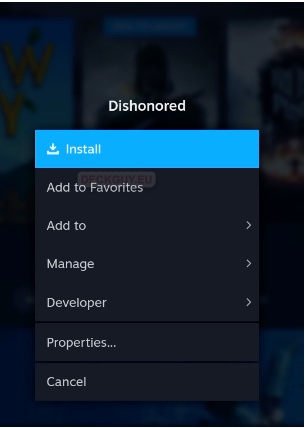
Properties – when we select Properties on a game, it will give us a separate submenu
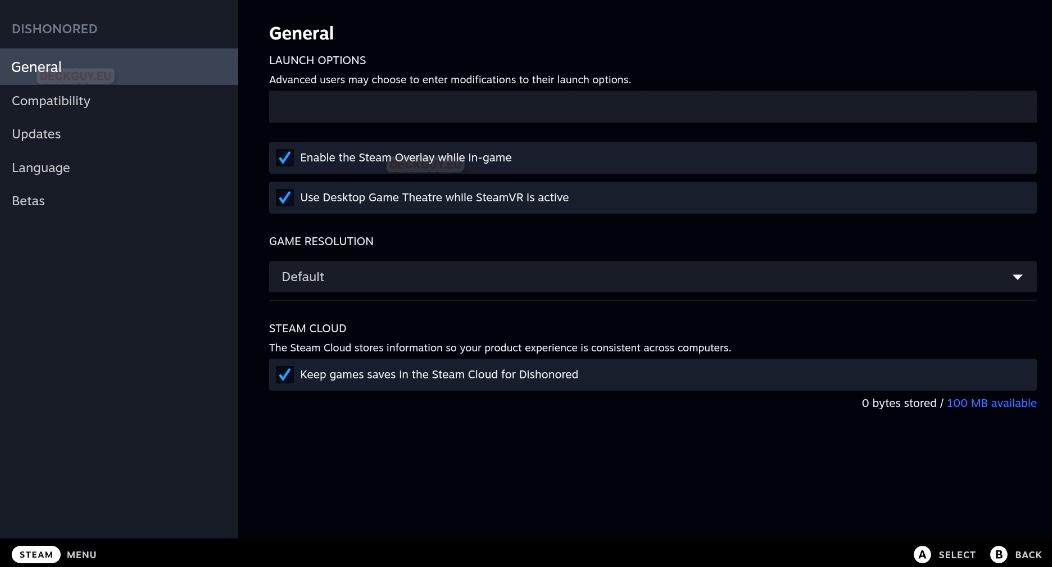
Under General – LAUNCH OPTIONS – you can specify mods for launch options – will speak some other times on that topic.
You can select whether you want Steam Overlay enabled in this game or not. Also, there is option for Desktop Game Theatre in SteamVR.
Under GAME RESOLUTION you can select up to 4K for the game – useful for some games (have in mind that higher resolution demands more capable GPU) on external display.
Under STEAM CLOUD – I would enable save on Steam Cloud – that way you have synced saves for the game across your devices.
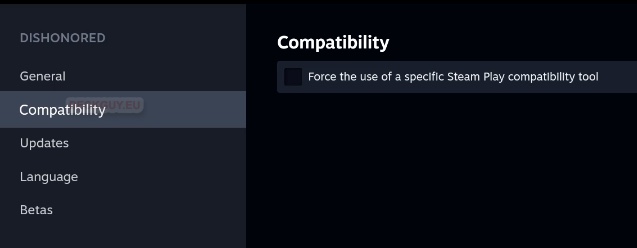
Compatibility – this is option we will need almost every time if we install non-Steam game – it will enable us to run Windows games on Linux. If we are doing game install through Steam, it will take care of that part.
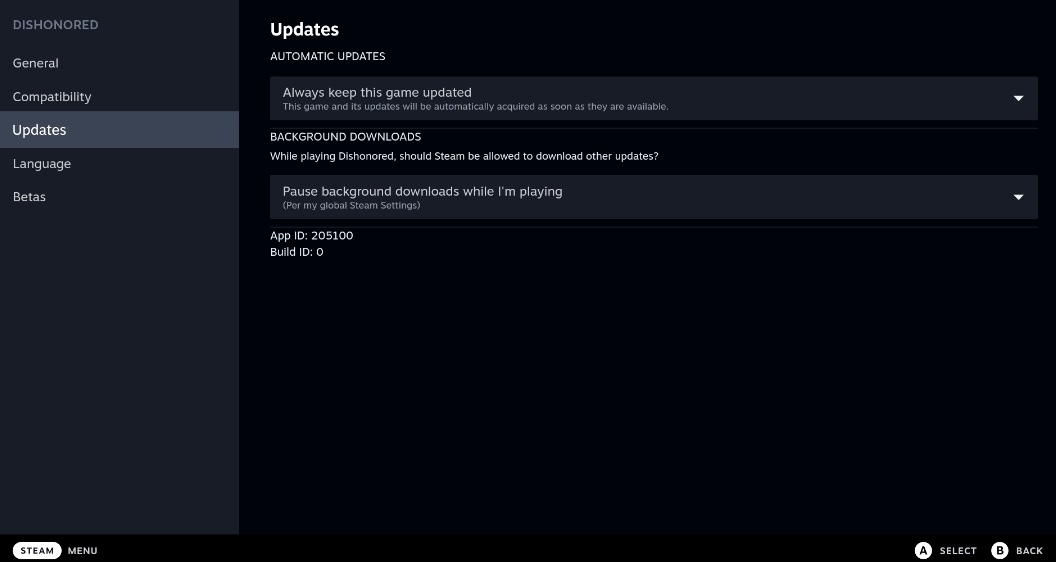
Updates – you can define updates option for the game. It really is up to you – I usually go with “Always keep this game updated” (although sometimes fresh version can break the game). And for Background Downloads – I would leave it as it is – this is important especially if you are playing multiplayer games or streaming – it can throttle your bandwidth.
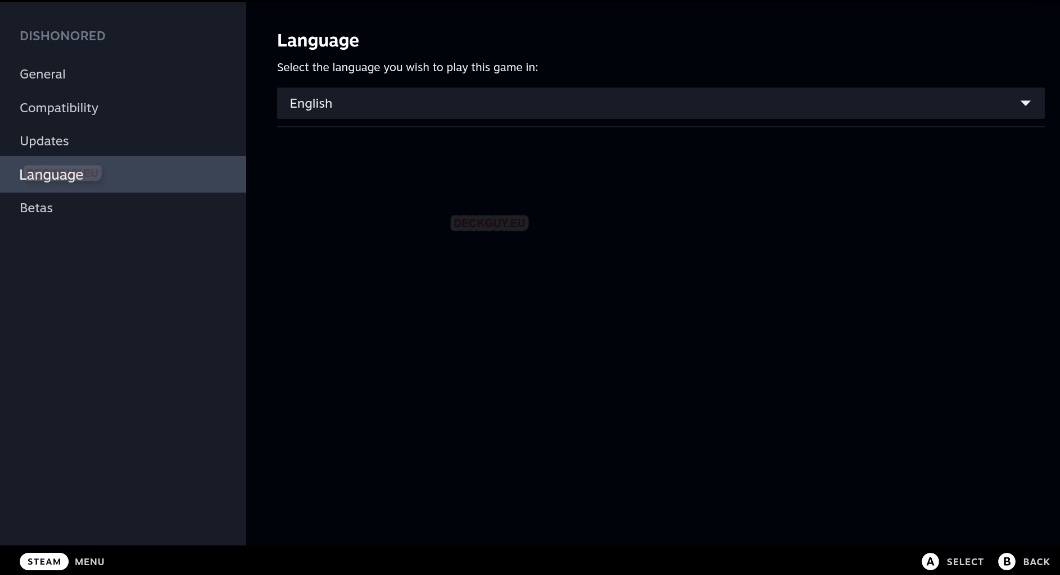
Language – if you don’t play in english, you can try your luck here if your language is supported.
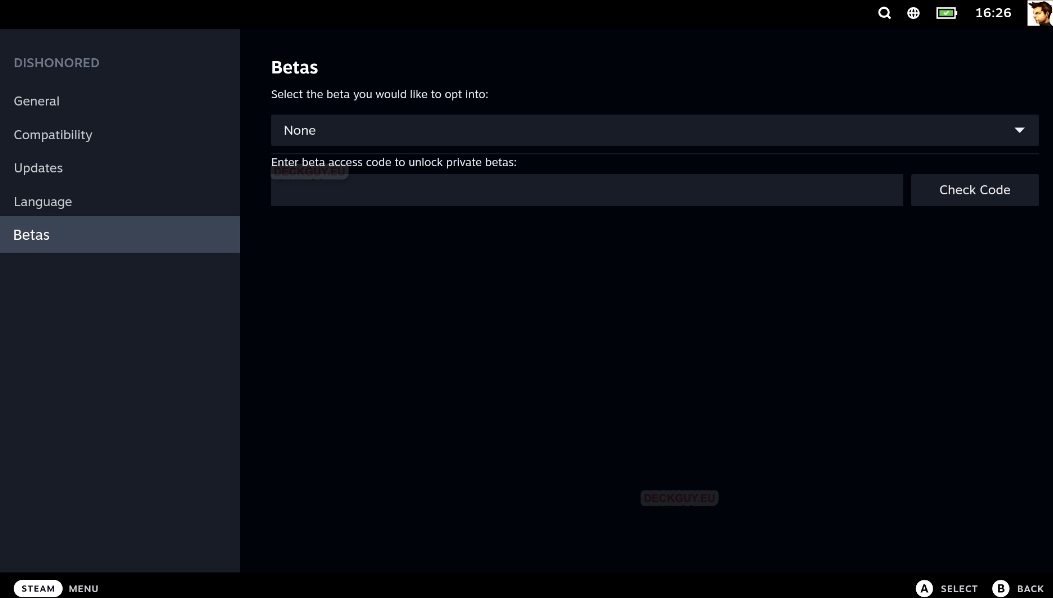
Betas – I don’t like betas and I won’t to opt into betas. But, if you do like to test stability and new features of a game, you can do it through this menu
Ok, that was all the things available after we press Options button on selected game.
Let’s get back to home screen
Installation
Let’s start back from Home screen – select game we wish to install and press A button to select a game. One thing to have in mind – if you already have a game collection at Steam, and you are not entirely new to Steam and Steam Deck – it would be worth to check if game you are planning to install is compatible with Steam Deck – I wrote about that here – check “Before we buy anything” section.
Now, before we just press Install, let’s familiarize ourselves a bit more with the game interface. There really is so much options in Steam Deck, and it would be pity not to learn, know and use them.
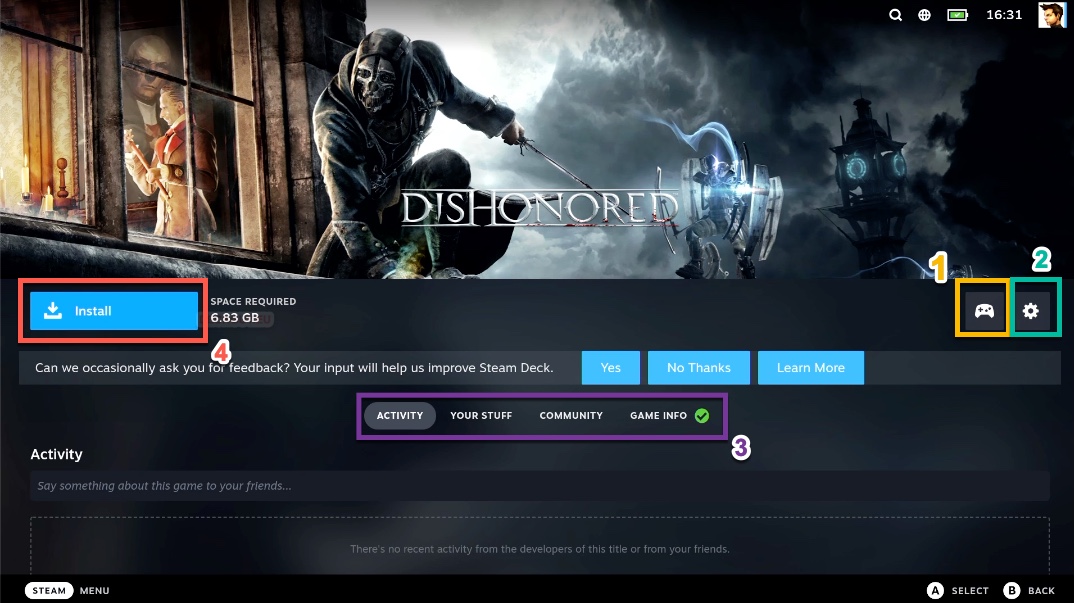
Ok, let’s start with number 1.
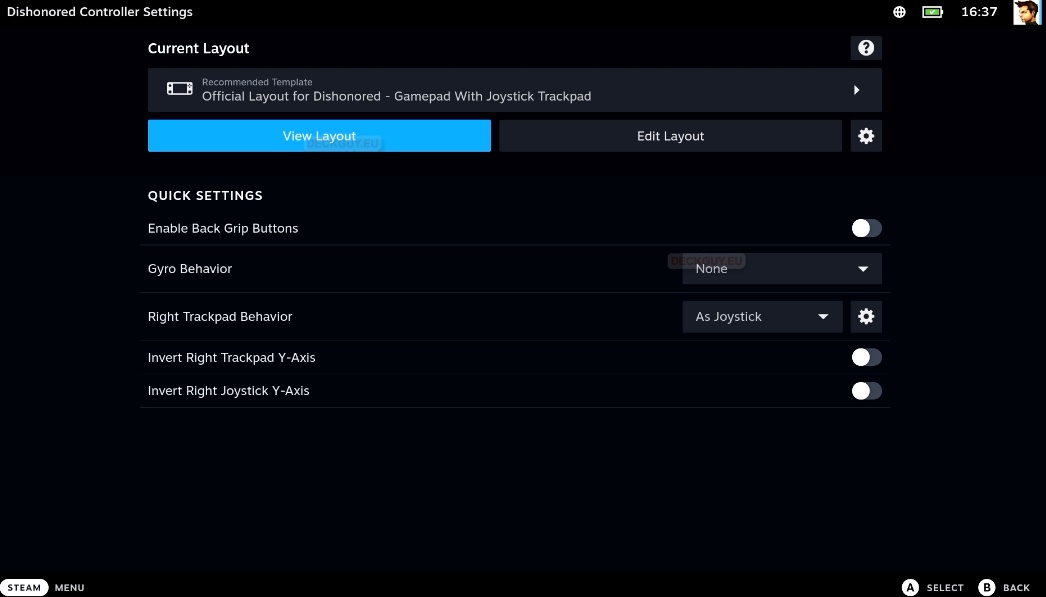
- Controller Settings – on this menu you will customize your game controls, you can view current layout, set new Steam Deck Controller layout, or maybe find community layouts for a game. Idea is to feel comfortable playing every game on Steam Deck. We will be covering that more in depth in playing part of the tutorial.
2. Is a menu we covered in above section with Options button
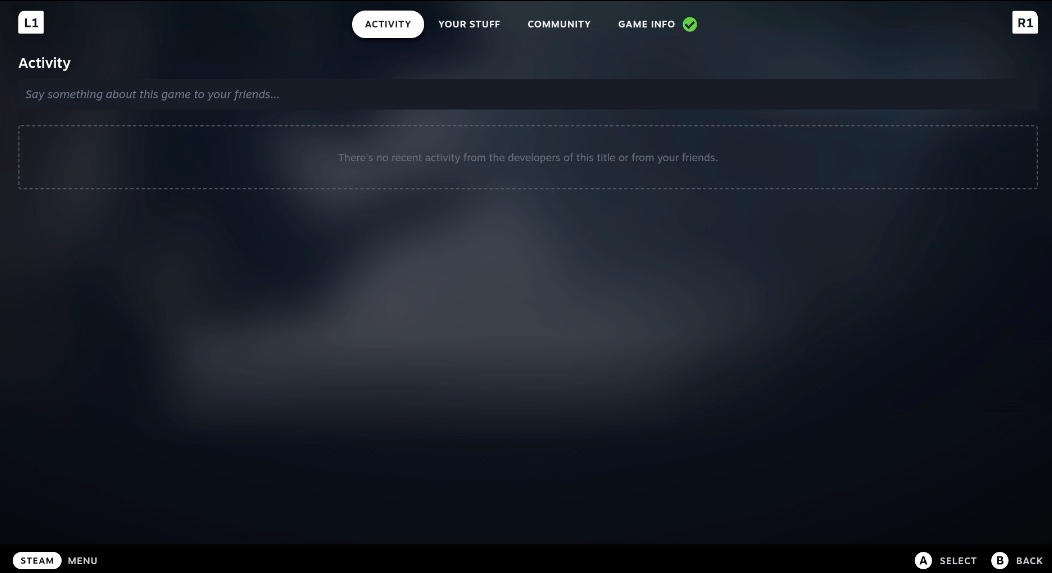
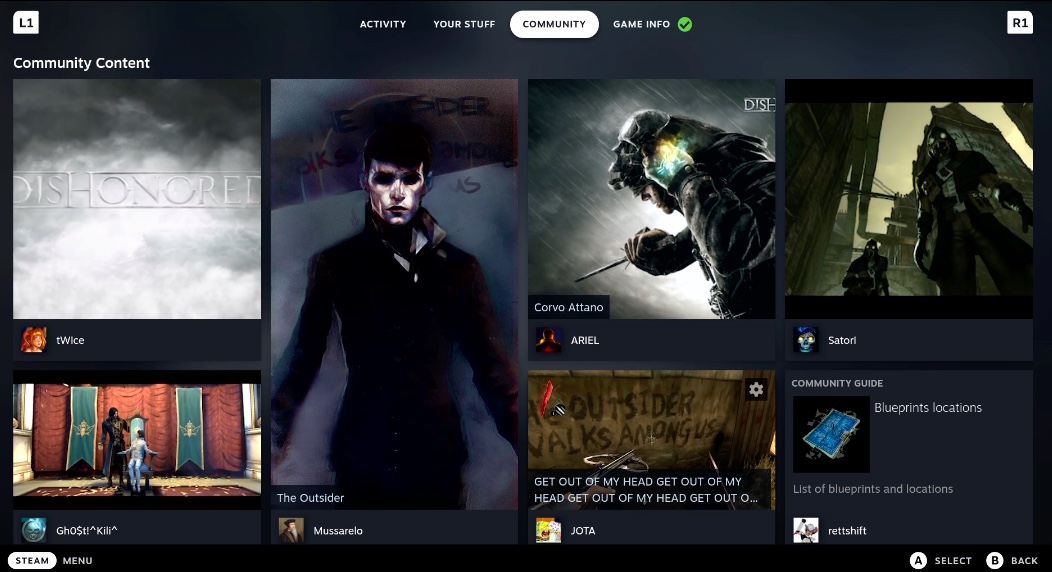
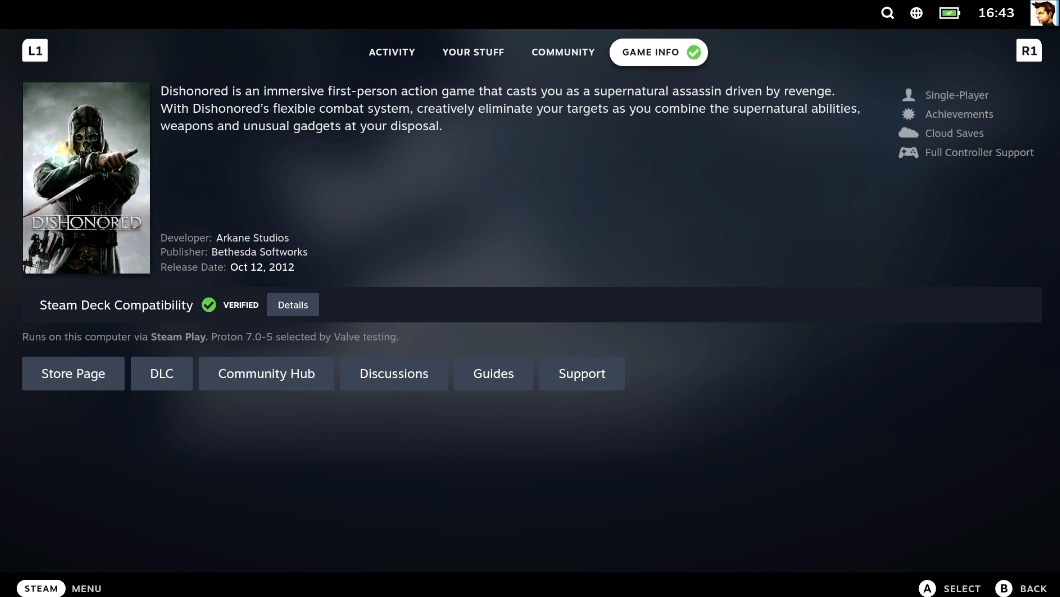
3. Activity, Your Stuff, Community and Game Info tabs (you are changing them with L1 and R1 buttons on a shoulder of Steam Deck.
Activity – if there are news from Developers, something from your friends – it will be shown here. Also, you can share something here for your friends.
Your stuff – Screenshots and Achievements from a game will be here

Community – game community content will be display here
Game info – this part I assume you checked before you bought game.
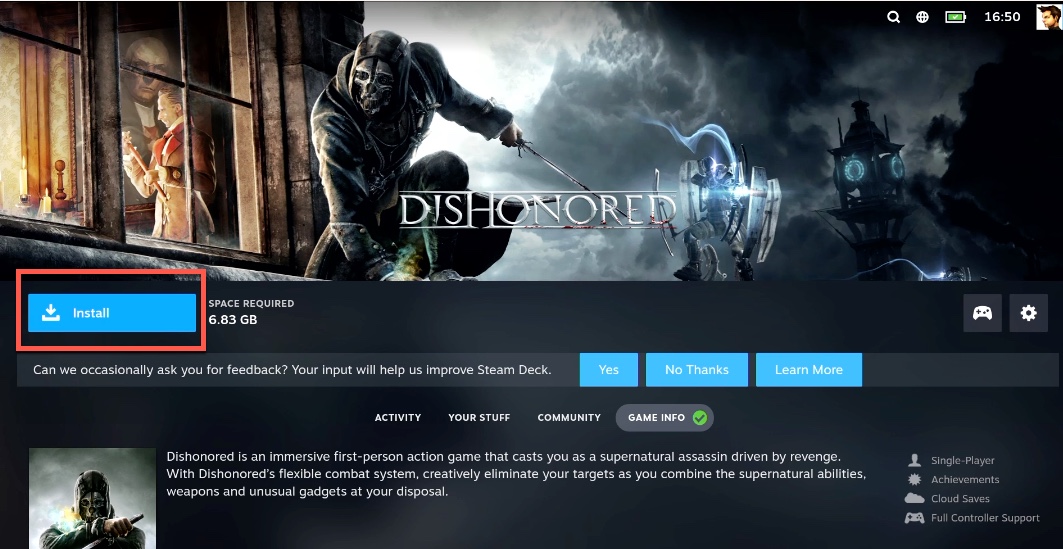
4. Install
Ok, finally, part you expected from this – installation. I’m sorry for taking so long to the main part, but I think it is necessary to familiarize yourself with the interface, so you can use full potential on Steam Deck.
Press A button to start Installation
Storage will always be a problem , so Storage Management is story for itself we will also cover. I will select Internal Drive for Installation and press A button
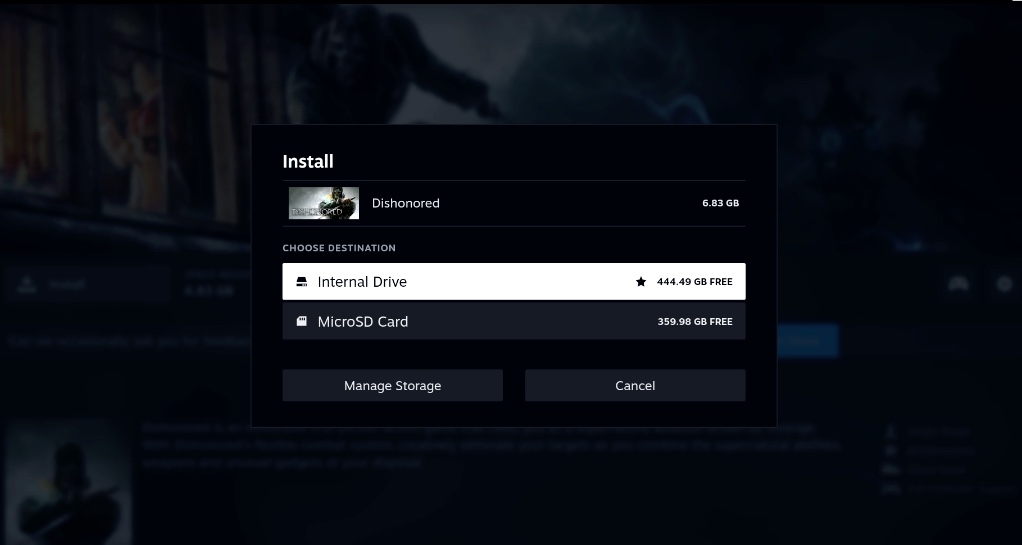
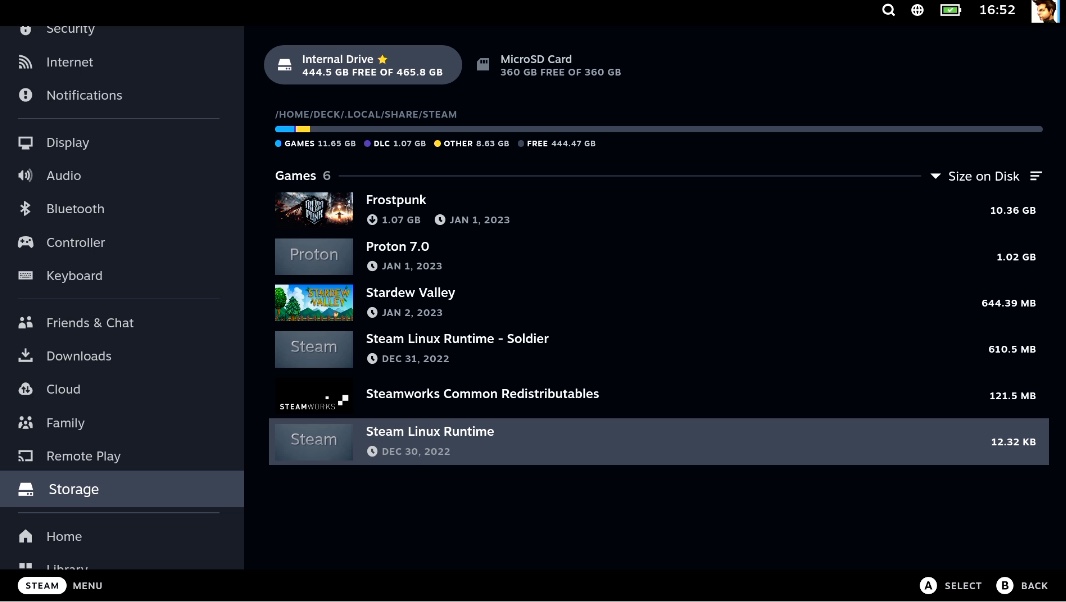
If you select Manage Storage – this is a screen you will get – here you can uninstall game, move content from Internal Drive to MicroSD and so on, and so on…
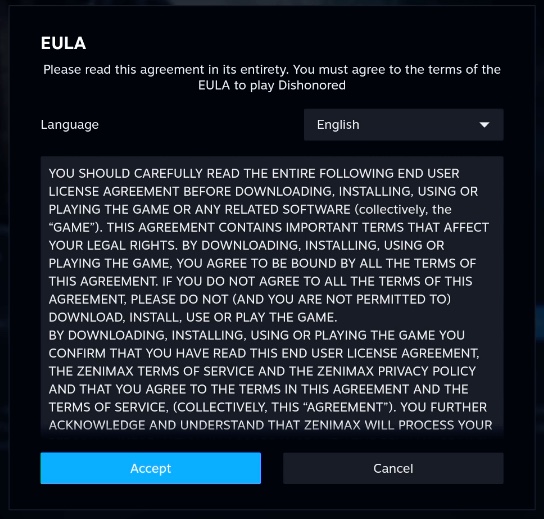
Before installation you should accept EULA -Press A to Accept
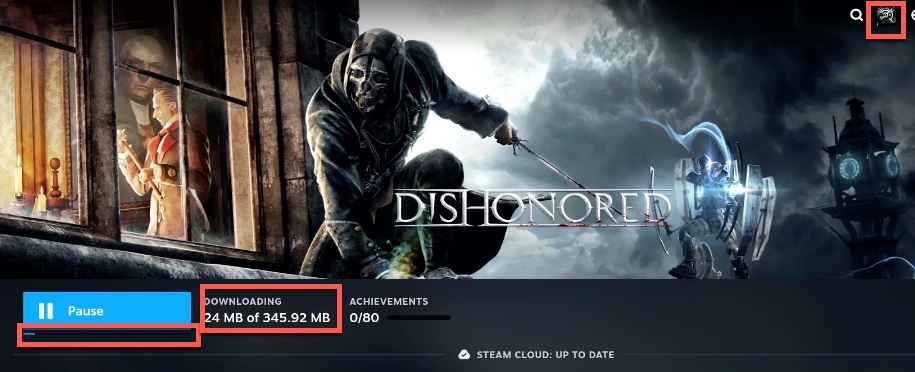
You will see you Download status in two places, in small icon on top right part of taskbar, and under ex. install button which is now Pause button – you will also see how much data is downloaded.
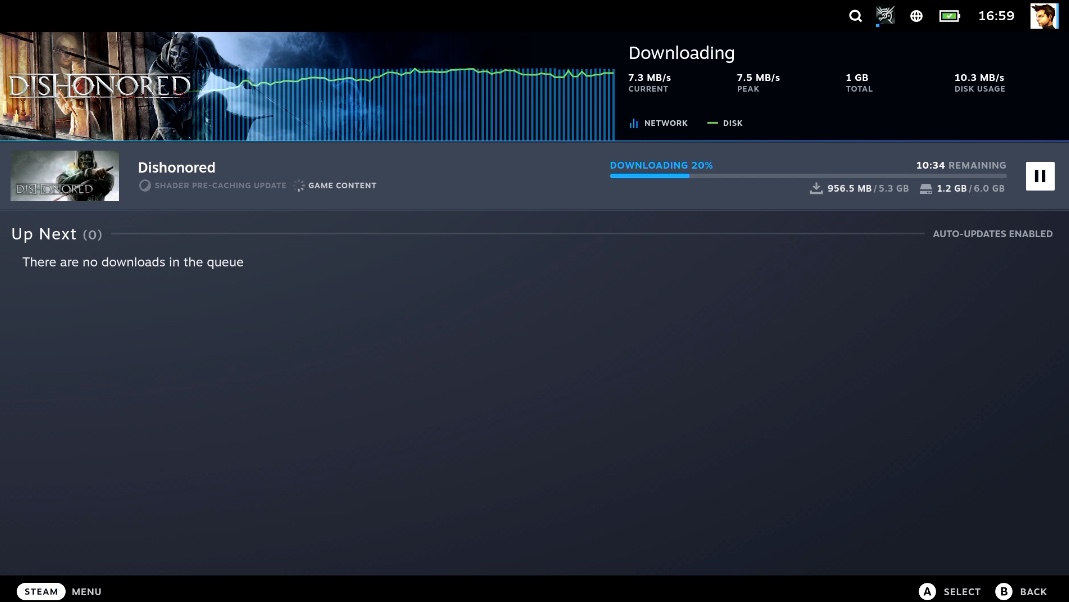
If you press Steam button and select Downloads – you will see your Download in details.
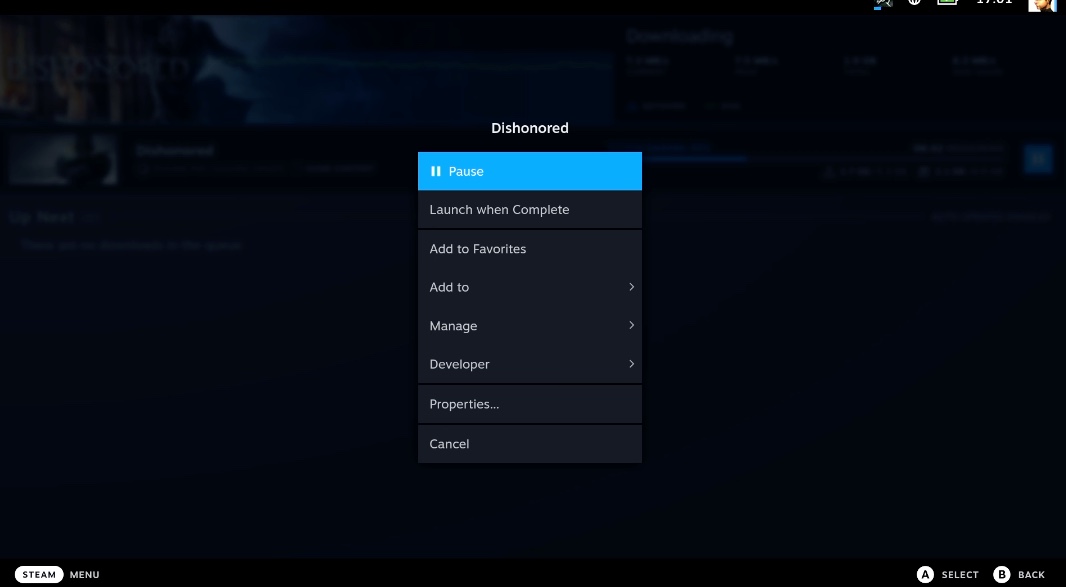
If you select a game download – you can press A to pause download or press Options button to display additional menu again
This time there are two new options on the menu – Pause and Launch when complete. We won’t select any of them. We will go back to Home menu and watch our Download unfold.
Finally, after some time… Game is installed – we can finally play!
But I will do that in another article, because there are couple of things you should set before starting to play.