
Maybe you want to test drive/run Windows 10 on your Steam Deck – you can, and it is officially supported by Valve. Great guys at Valve. In this tutorial we will only use our Steam Deck console, and we will be booting Windows 10 of our MicroSD card – so, we’ll have dual boot – both SteamOS and Windows 10. This way you can test drive Windows on Steam Deck, or you Windows when you need it.
We will need a couple of things for this guide. This guide will completely be done on your Steam Deck. It will also be complete and detailed guide with every step until you boot to Windows and have functional network.
If you wish to create your own Windows to Go installation and use it, here are two guides I did on that topic – so two links below are separate topic if you want to do it yourself – you don’t need them for this guide!!!
Windows To Go MicroSD creation for Steam Deck
Prerequisites
MicroSD card – one with a good amount of storage and good speed. I’m currently using only MicroSD cards with these specs for my Steam Deck – other cards will be slow – but if you don’t have choice – use what you have. Make sure that MicroSD card you are using is empty, you will lose all the data on it in this process!!!
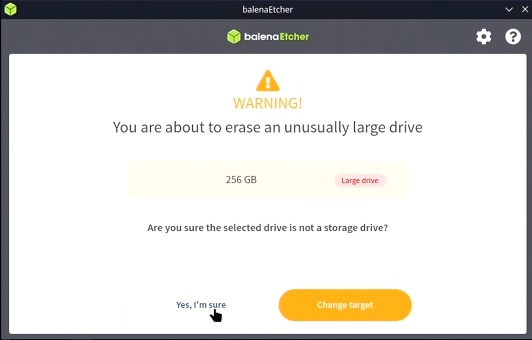
For this guide I will be using 256GB MicroSD card SDXC I U3 V30 – Sandisk Extreme.

Windows To Go – this is version of Windows 10 that can be booted from USB or MicroSD card. These versions are super convenient – in the beginning you could install them only on certified USB sticks – but today you can install on anything. Be aware that Windows To Go don’t get feature updates – you can read in more details here – https://learn.microsoft.com/en-us/windows/deployment/planning/windows-to-go-overview
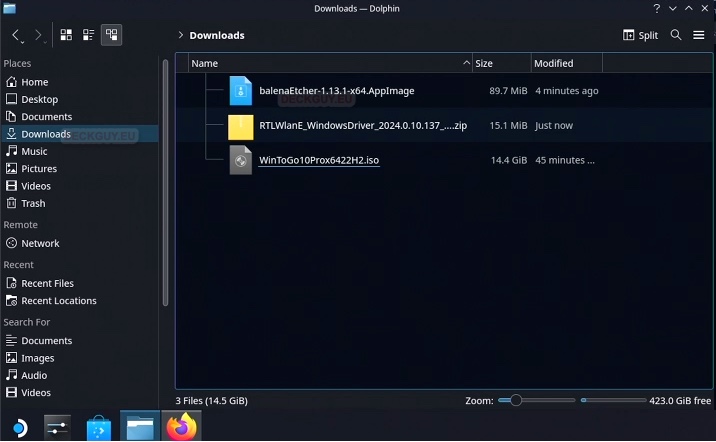
Here is my link on which you can download Windows to Go 10 Pro x64 22H2 version ISO – it is 14.43GB in size – https://drive.google.com/file/d/1MB3YZYs5iKIaBl1qmemIKqpVTzXT0G8u/view?usp=sharing
It is clean installation – without any shady stuff – you only have SteamDeck Wi-Fi driver in C:\SteamDeckDrivers, because you will need it to connect to the internet and download the things you need – you will also need your Windows key and activation for this installer.
Again, I advise that you use faster MicroSD cards for this – with specs above if possible – I spent some time testing Windows To Go – and it can be slow.
Piece of advice for general usage on the internet – always download software from official sources or try to create software installers yourself – don’t trust people on the internet.
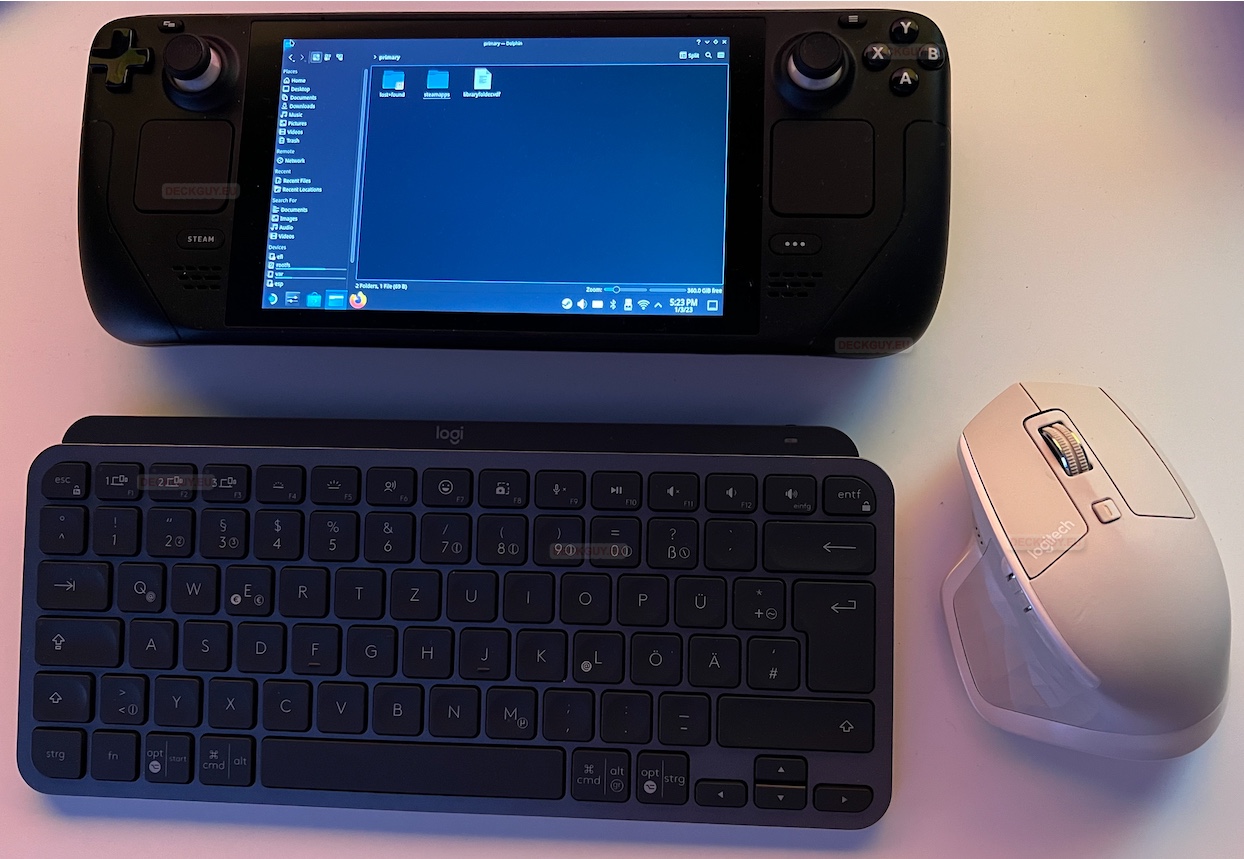
Steam Deck in Desktop Mode with mouse and keyboard – if you don’t know how to enter Desktop Mode on Steam Deck, here is my guide . Mouse and keyboard you can use through some dock, or bluetooth – Steam Deck is again pretty good with dealing at all kind of peripherals – and it will make our life easier in this case. All this can be done without external mouse and keyboard – but this way it is more comfortable
For this guide WIRED keyboard and Mouse, or models that have USB dongle are best – bluetooth won’t be able to sync in Boot Manager!
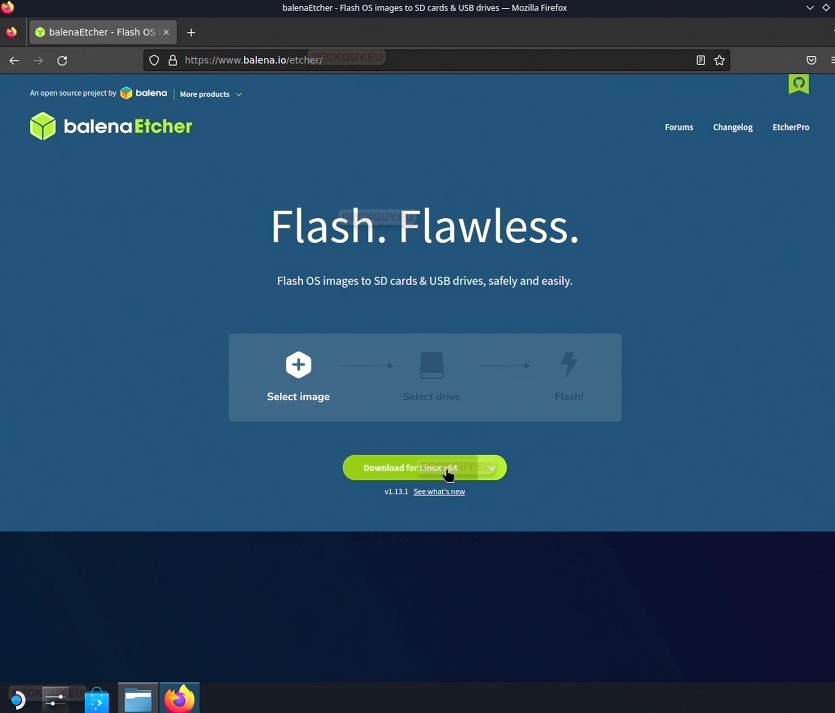
Balena Etcher – we will download it from here in Steam Desktop mode to “burn” our ISO to MicroSD we connected to Steam Deck.
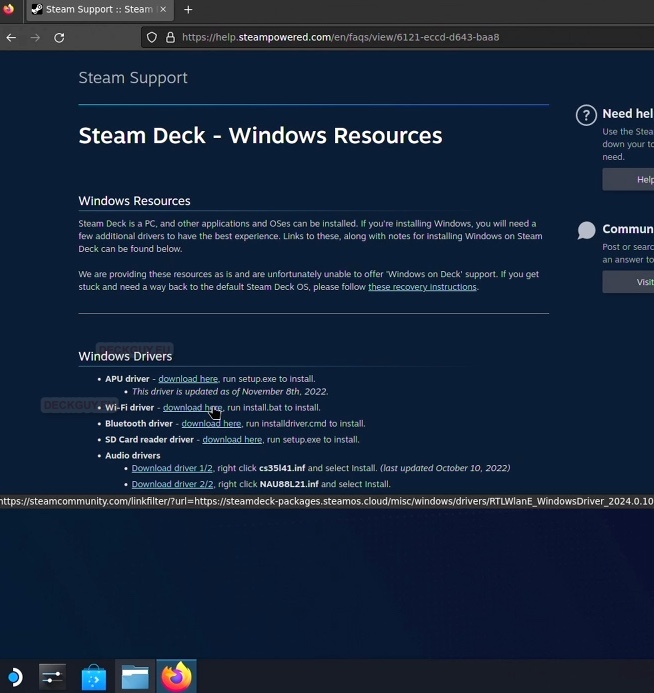
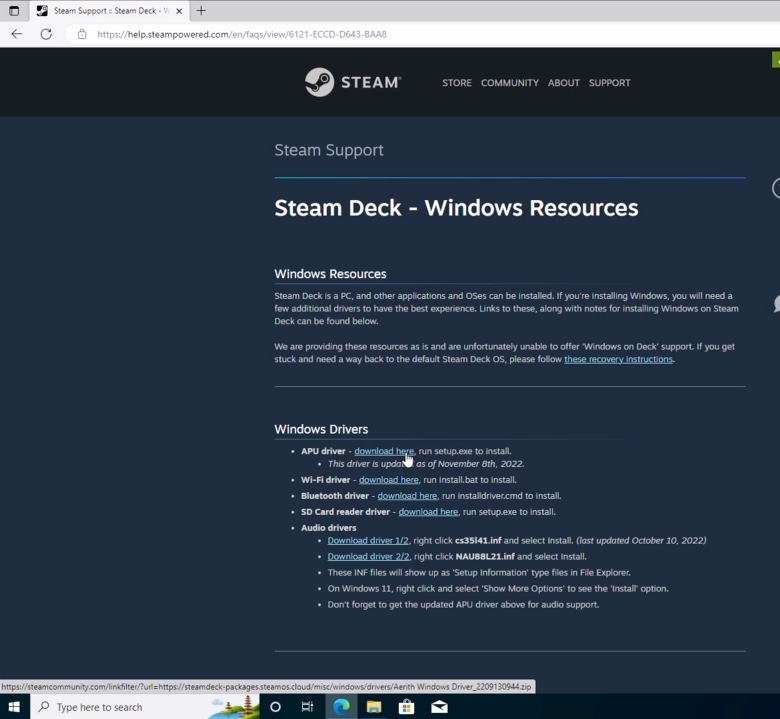
Steam Deck Windows drivers – Steam Deck Windows Drivers are available here. We will need them to install drivers we are missing after we are done. Both Windows 10 and Windows 11 are supported – here we will be dealing with Windows 10.
Preparing MicroSD card
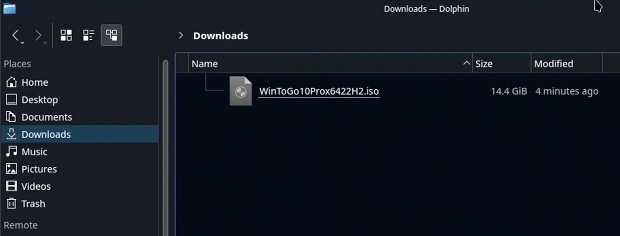
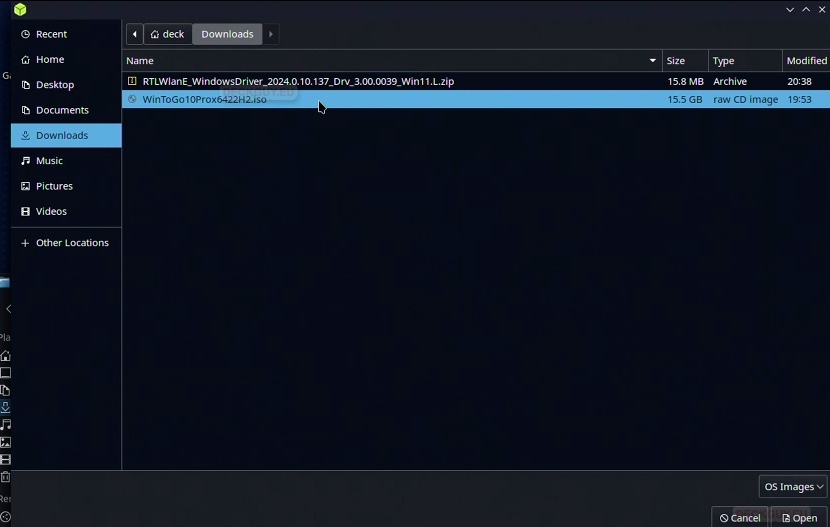
First, prepare/download your Windows To Go 10 installation onto your Steam Deck (I have it in my Download folder on Steam Deck). Again, here is my Download link for my Windows To Go installation – https://drive.google.com/file/d/1MB3YZYs5iKIaBl1qmemIKqpVTzXT0G8u/view?usp=sharing
Now, we will download Balena Etcher from here . It should also end up in your Download folder by default.
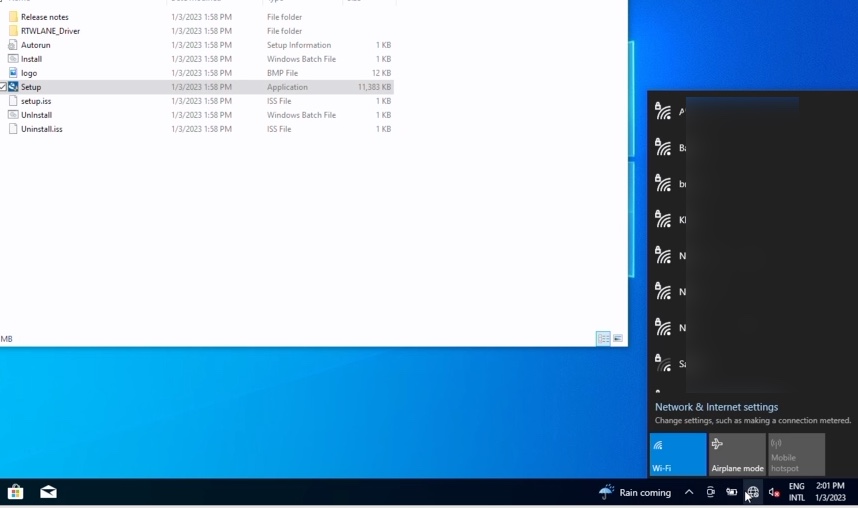
From Steam Support download Wi-Fi driver for Steam, we will need it now (although it is already inside my installation)
Ok, we now have our ingredients in our Download folder
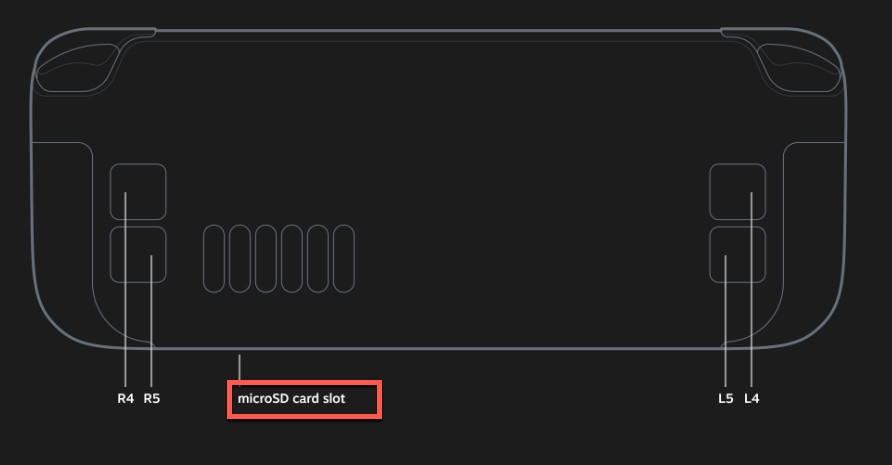
Now, make sure that you have MicroSD card in your card slot – and make sure that you don’t have any important data on it, MicroSD card you have inside now will be completely wiped
You don’t have to mount MicroSD card, leave it as it is.

Let’s go back to our Download folder and double click on Balena Etcher to start it
If you are starting something for the first time on Steam Deck in File Explorer – you will be asked what do you wish to do with the file – we want to execute this one
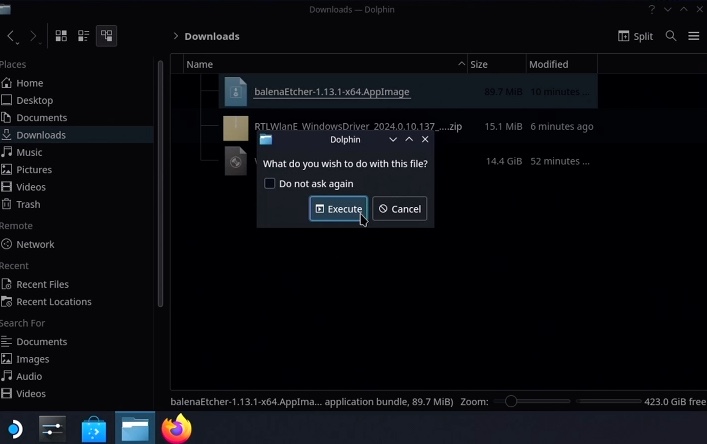
We trust this program and we want to execute it – Continue

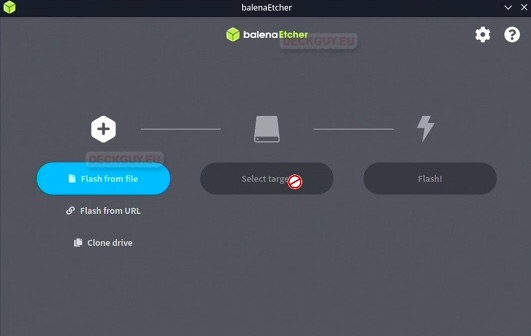
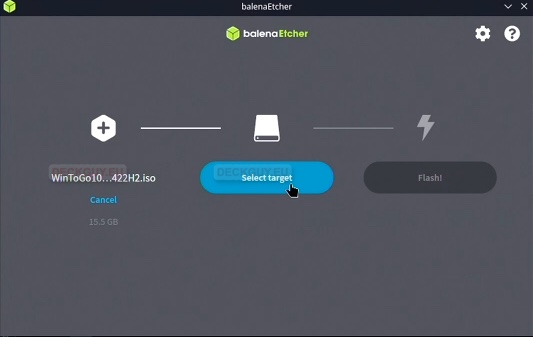
The program is started!
Under + sign we want to Flash from file – go ahead and select your ISO file
Select WindowsToGo ISO file you created/or downloaded from my link.
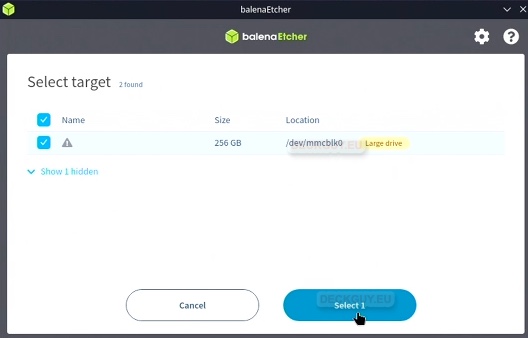
Ok, our image should be selected now – if you get warning – you can close it/ignore it, should be fine. Select target – select your MicroSD card (mine was already formatted as NTFS by default)
Select your MicroSD card…
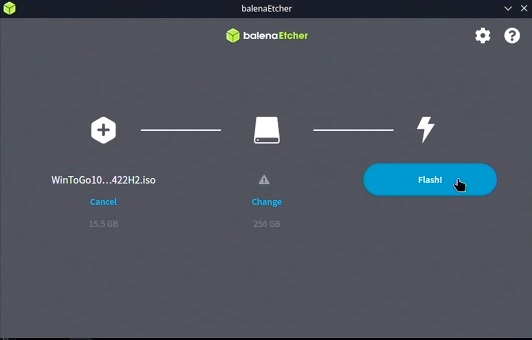
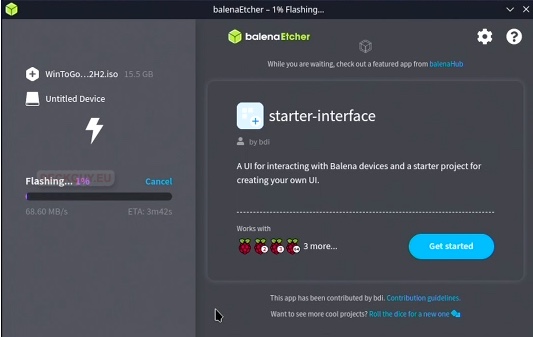
Ok, click on Flash
You will be warned one more time if you have large MicroSD – Yes, I’m sure
Flashing should now start…
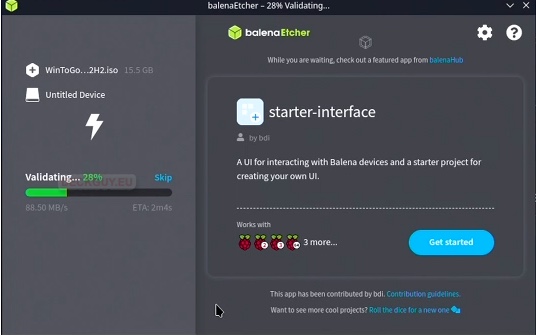
After Flashing is done, it will start validating… We will let it do that also, to make sure everything checks out
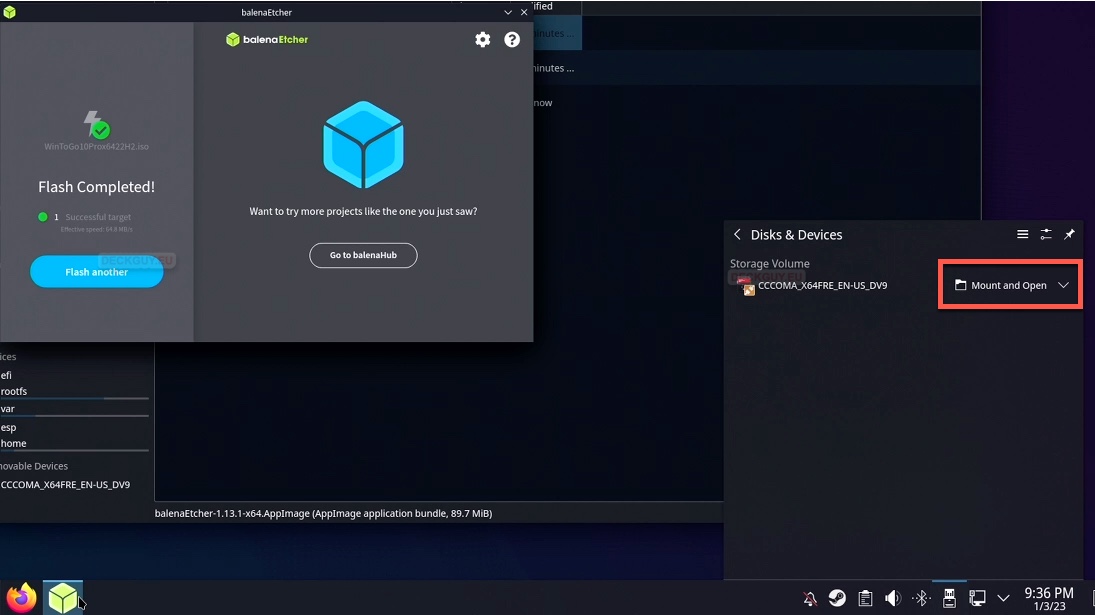
Ok, we are done and after flash is done pop-up will appear with our MicroSD ready to mount
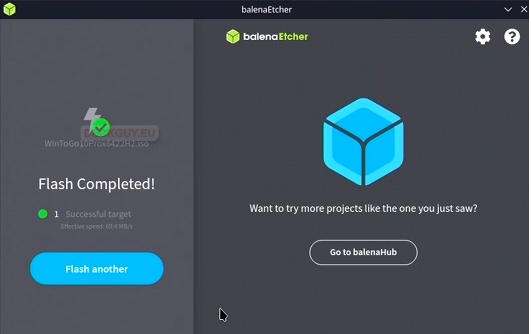
Click on Mount and Open – if your Disk doesn’t pop-out like my did, you can select it in taskbar and select Mount. We can now close Balena Etcher
Mount

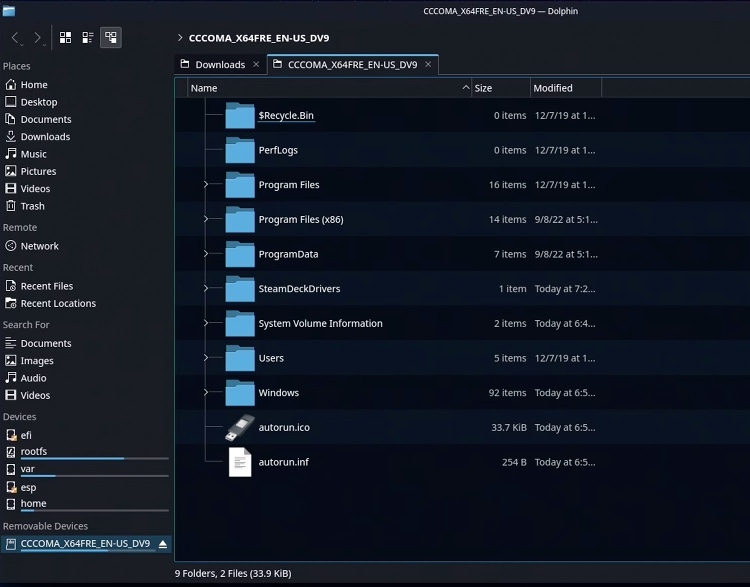
and after that click on “Open with File Manager”

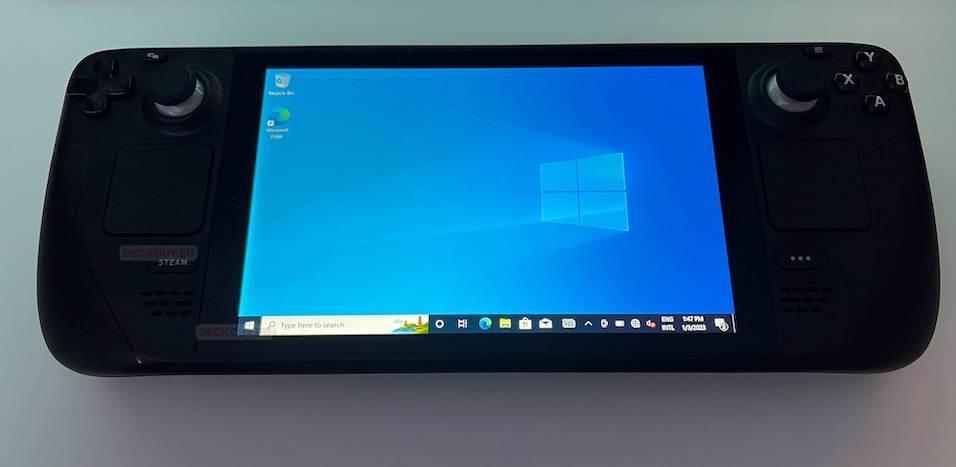
Our Windows install looks ready
Inside my SteamDeckDrivers folder in C:\ you already have Wi-Fi driver.
If you are using your installation – copy it somewhere on MicroSD in root – so you have it at hand after we boot into windows.
Ok, time for a test
Shutdown your Steam Deck – MicroSD we created should stay in it – because we will try to boot to Windows
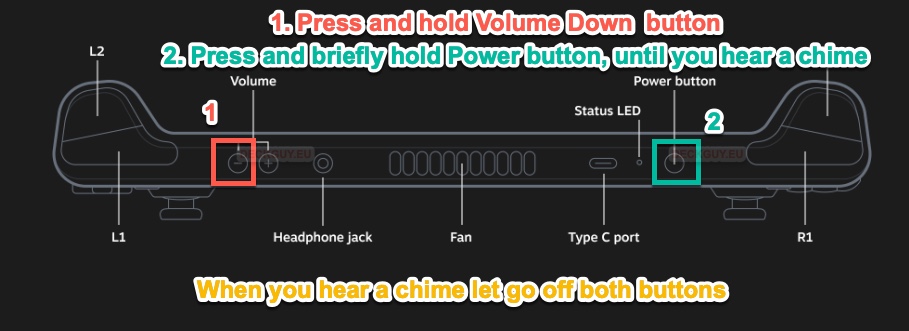
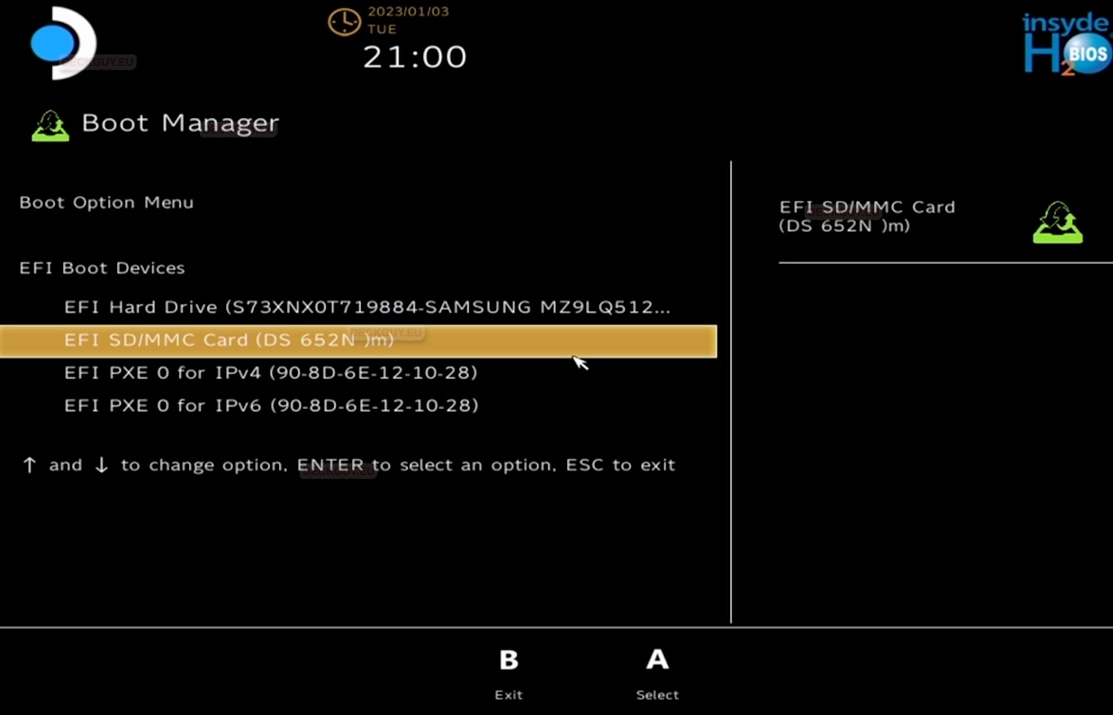
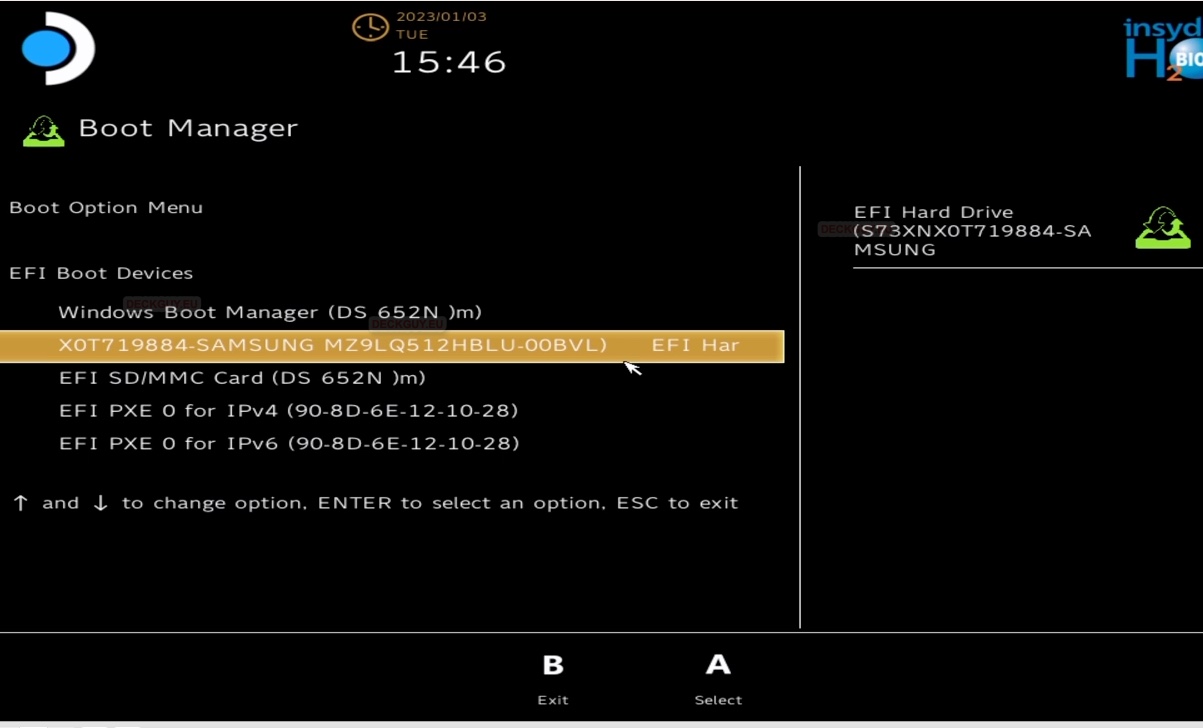
We now need to boot our Steam Deck into Boot Manager. Ok, I covered Boot Manager in this guide.
I will quickly copy here, what you need to do – “After Steam Deck is turned off – press and hold Volume Down button – and then press and briefly hold Power button just until you hear chime sound – when you hear first chime – let go of both buttons”
OK, we are in boot menu, and we will select our MicroSD card
Something is happening

Physically, it is upside down on Steam Deck, but we will get to that
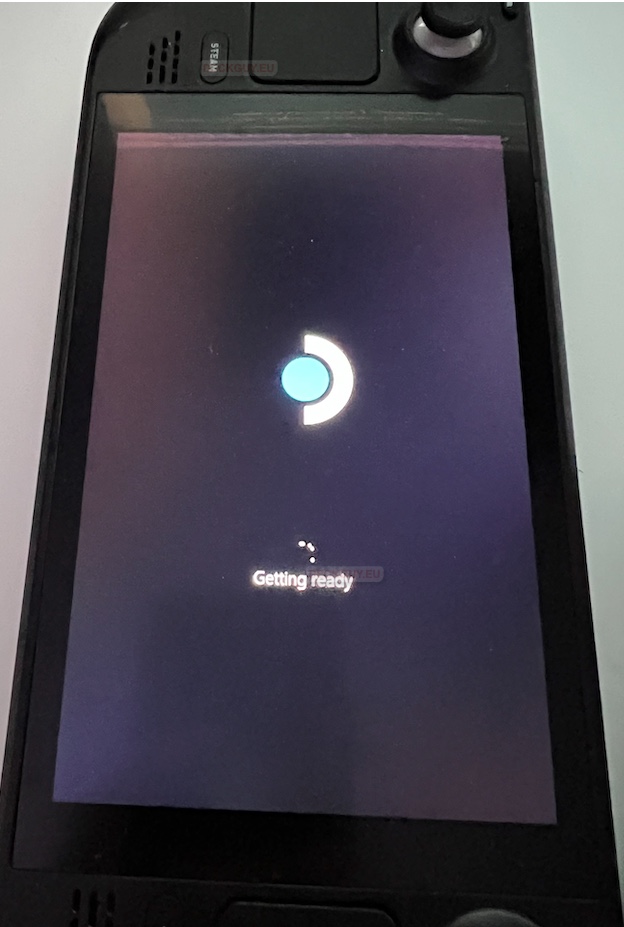
We are on setup screen, exciting times
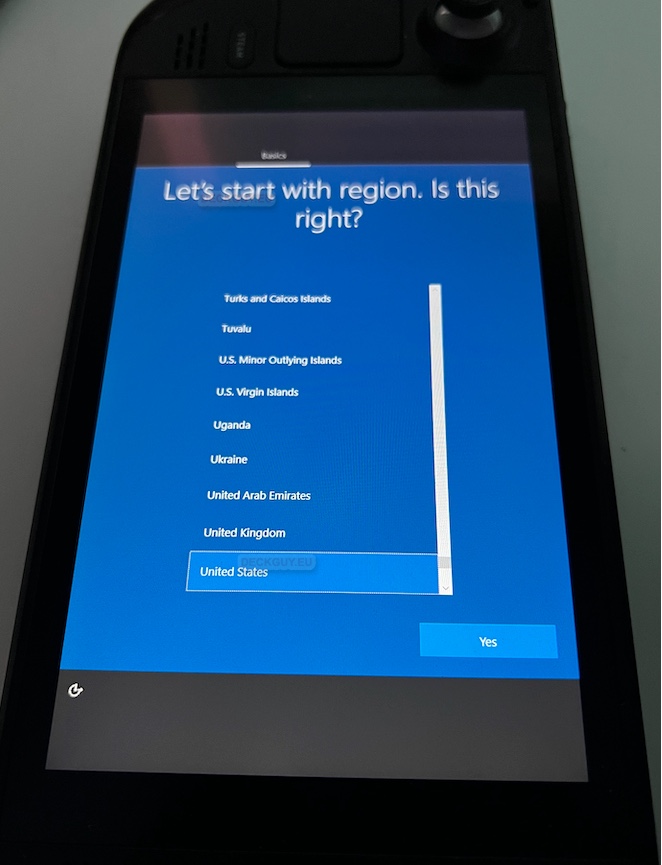
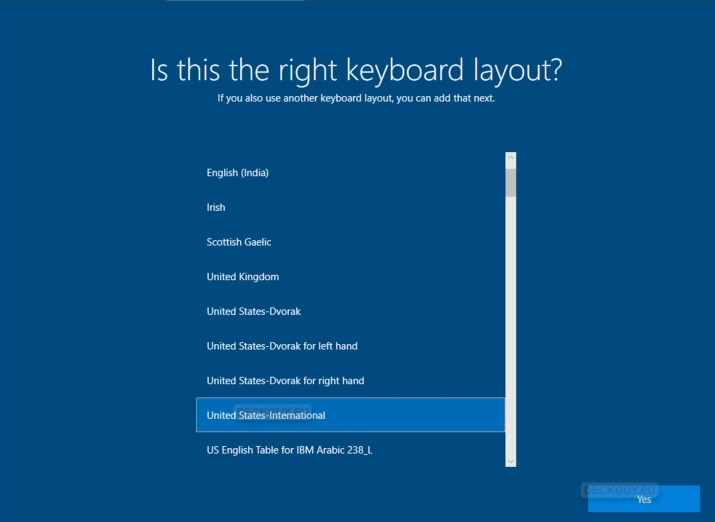
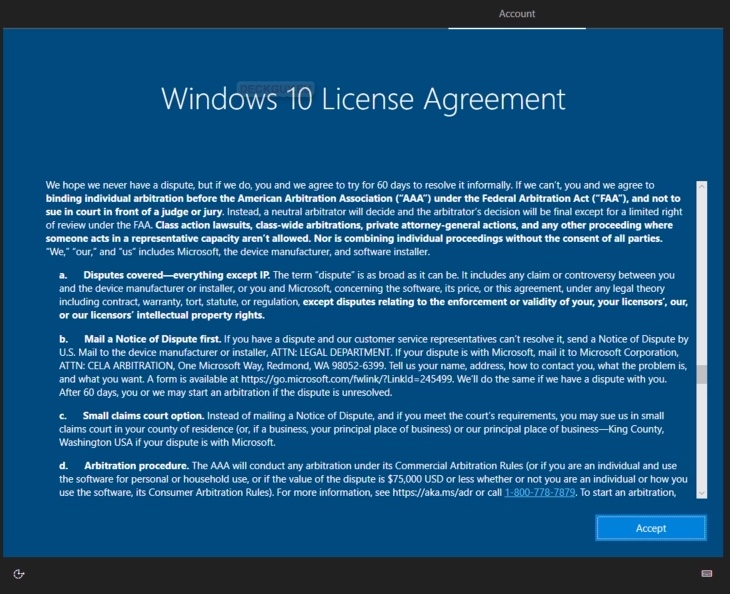
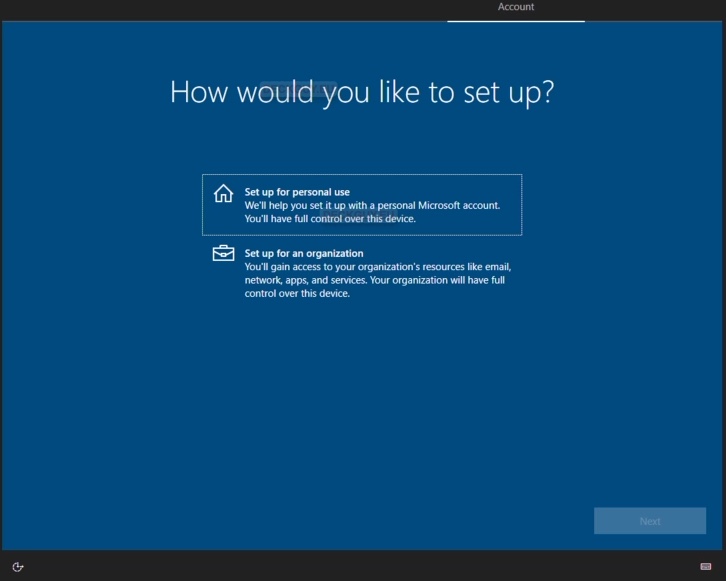
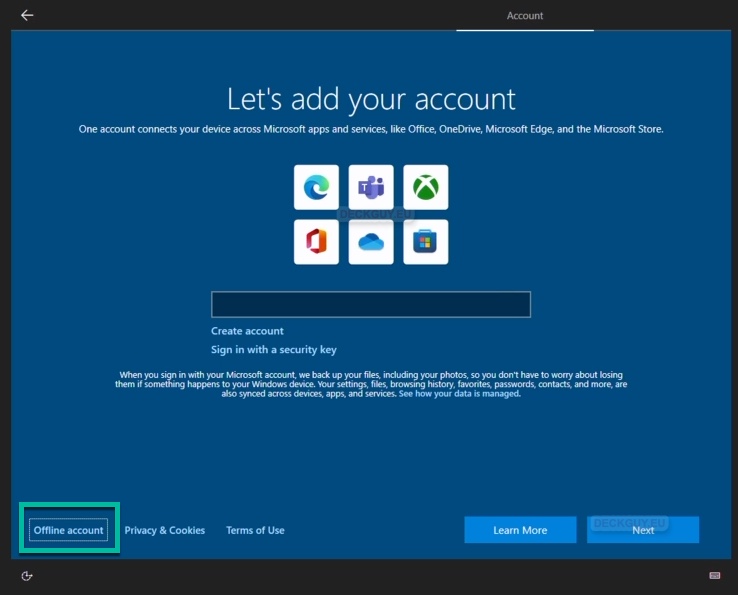
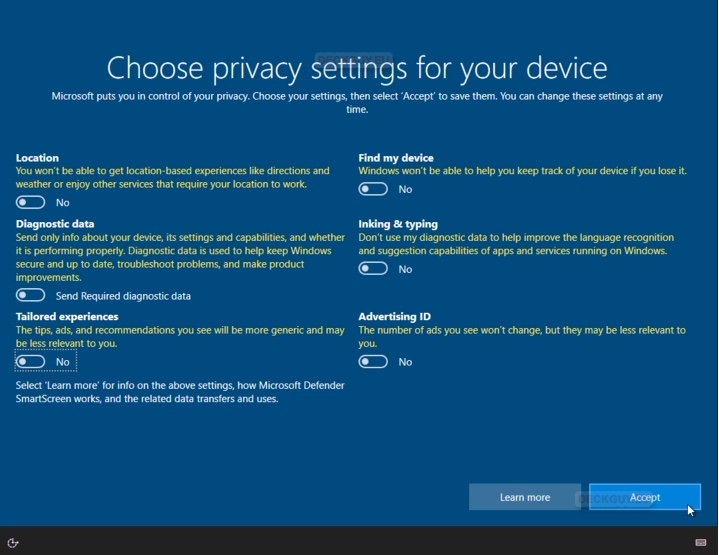
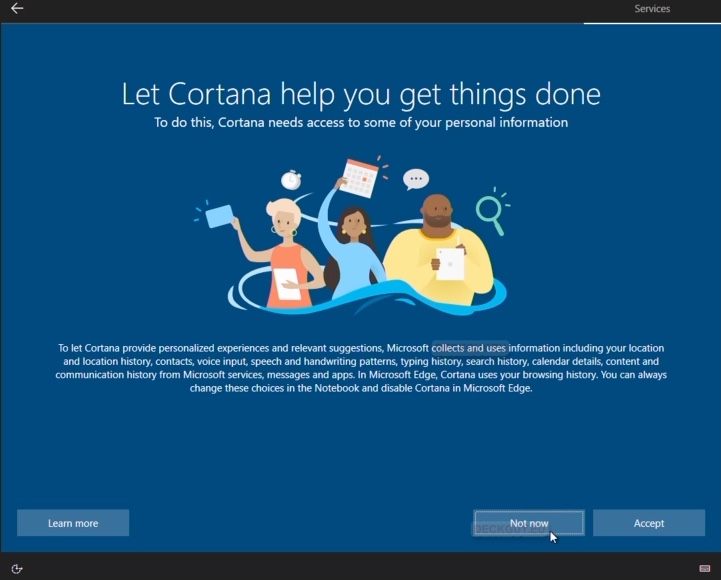
Let’s quickly jump through Windows initial setup, I won’t explain too much…

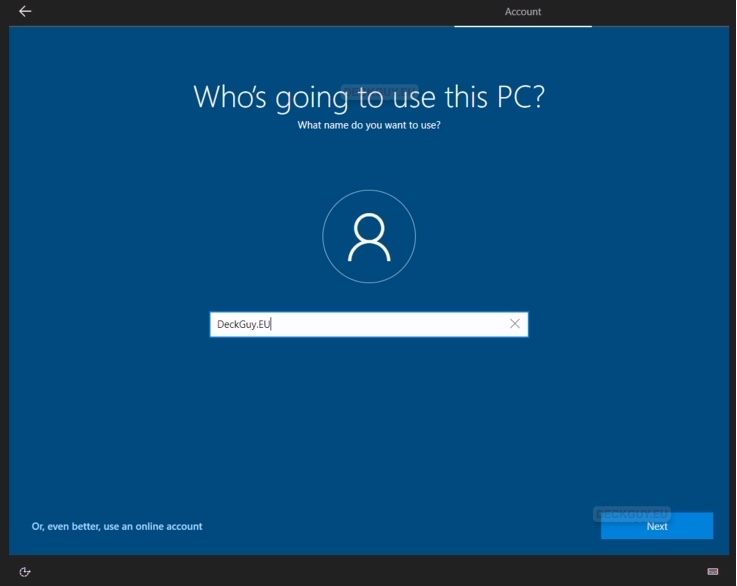
You will be asked one more time to confirm your pass…

You will have to select and write down answers to three security questions…

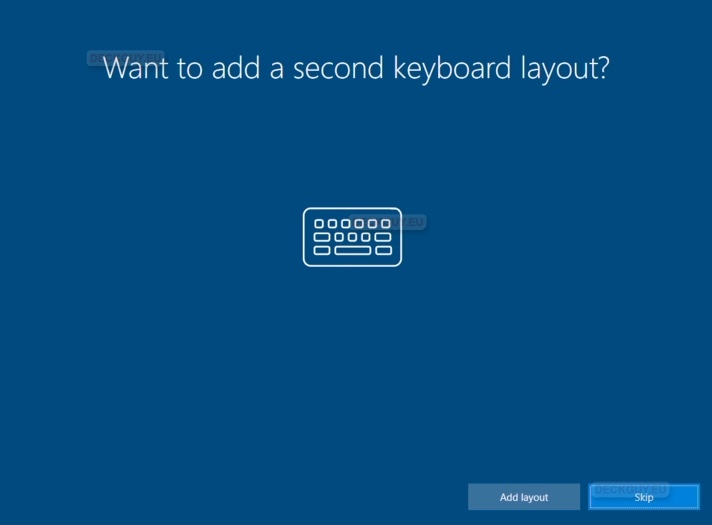
Skip

And finally

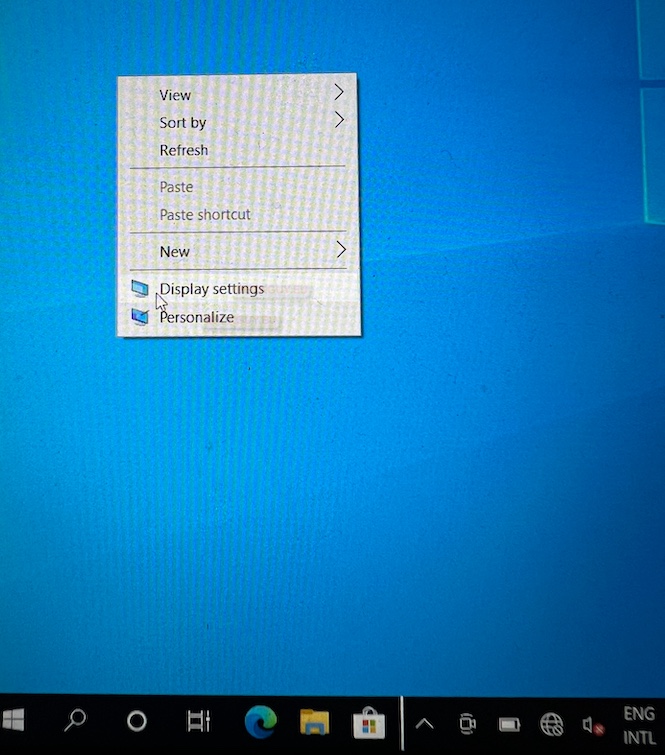
First let’s rotate our screen – right click or touch and hold on your screen
Select Display settings
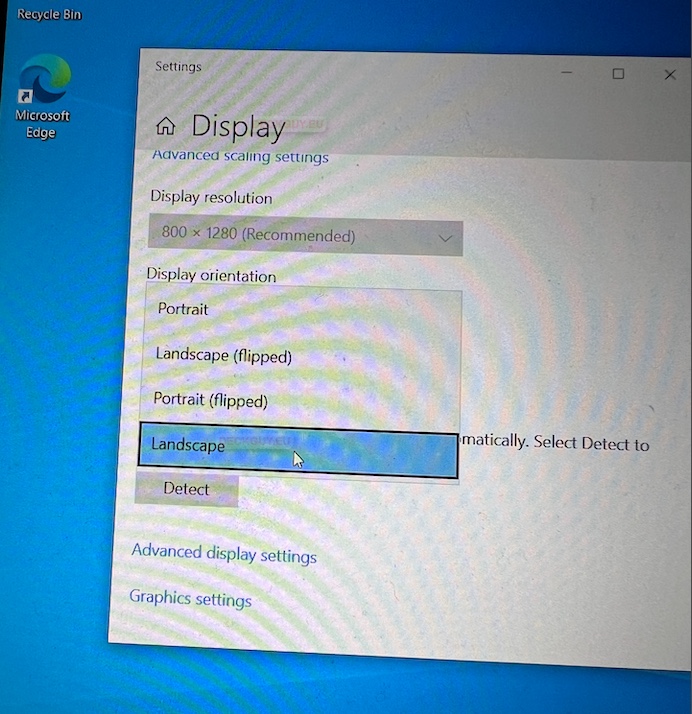
Under Display orientation – select Landscape – finally we are at peace 🙂
Ok, finally we will go to our C:\ drive into C:\SteamDeckDrivers and unpack our Wi-Fi Driver
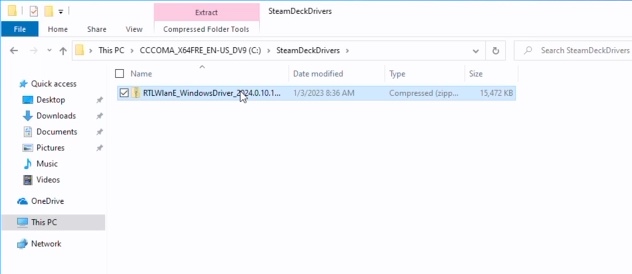
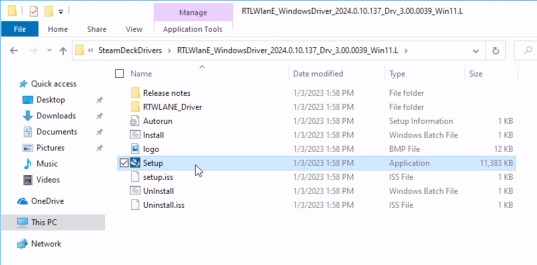
After you unpacked driver – select Setup
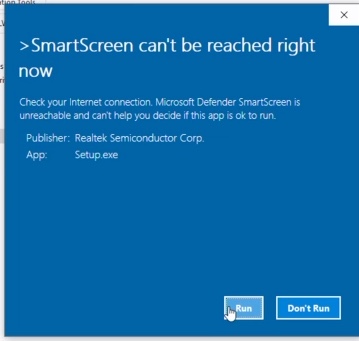
Run
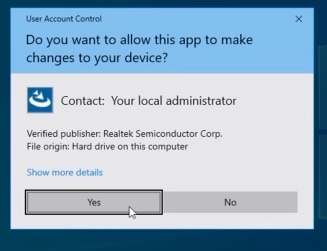
Yes
Driver should soon be installed – Finish
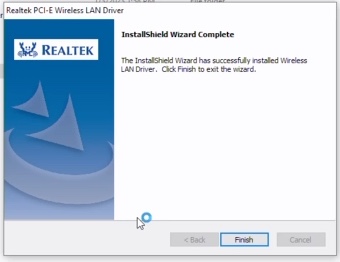
You now have network connection
Now, go and get your other drivers for Steam Deck on Windows from here
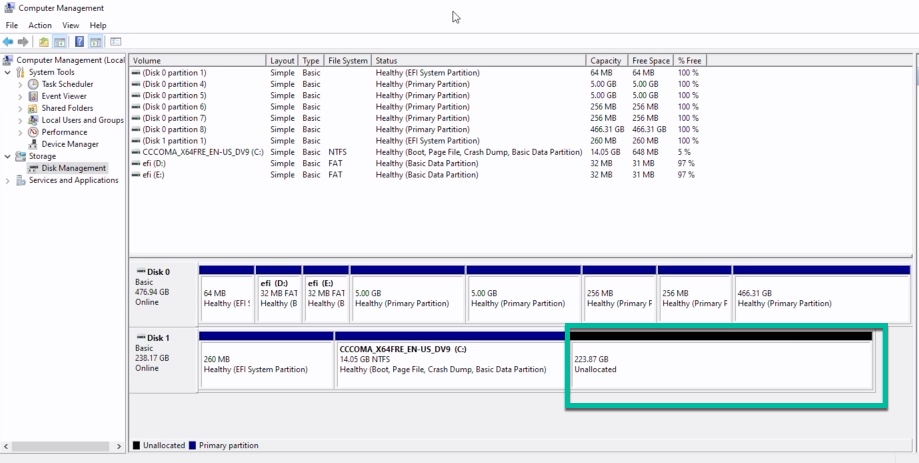
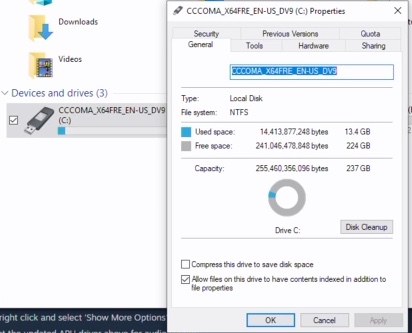
Before we install drivers – we have to deal with our disk space – image I prepared was 14.4GB in size – Balena Etcher carved that much space on our MicroSD, and made C drive exactly that big.
I used 256GB MicroSD card, so there should be more space.
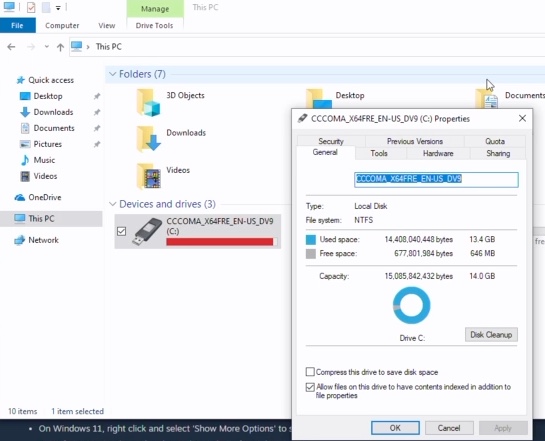
Go to Control Panel – Administrative Tools – Computer Management – Disk Management
There is plenty of unallocated space
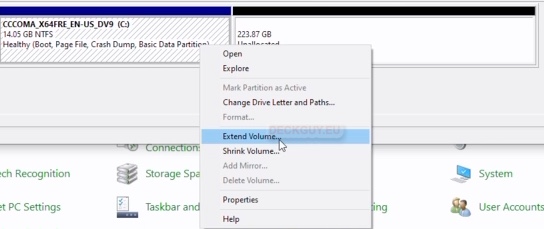
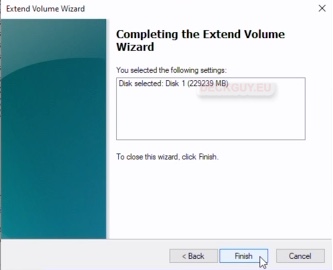
Let’s right click on our C drive and select Extend Volume…
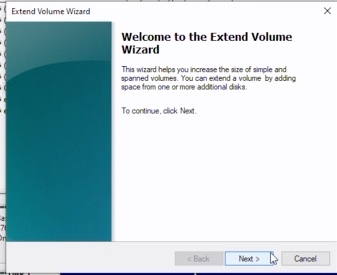
Next
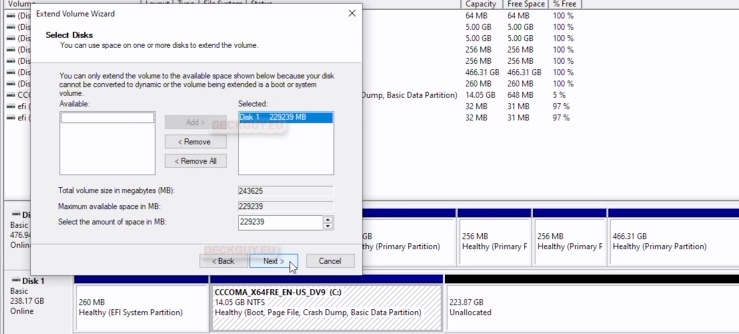
I will select entire available space and select Next
Finish (and hope for the best)
Looks fine

Now our C drive looks much better
Ok, we can proceed and install all drivers
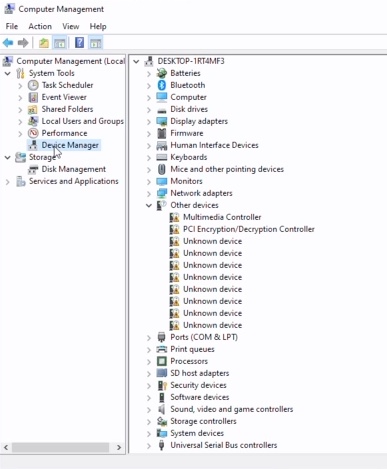
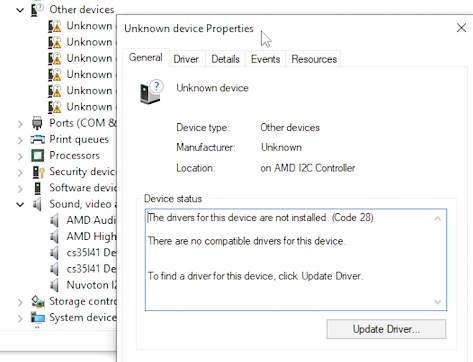
Currently our device manager looks like this
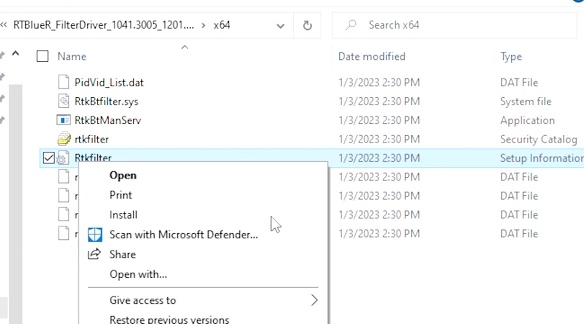
Part of the drivers don’t have installer – so you can select Setup Information file – right click on it and select Install
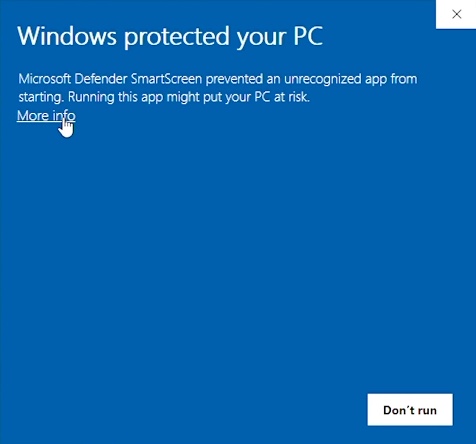
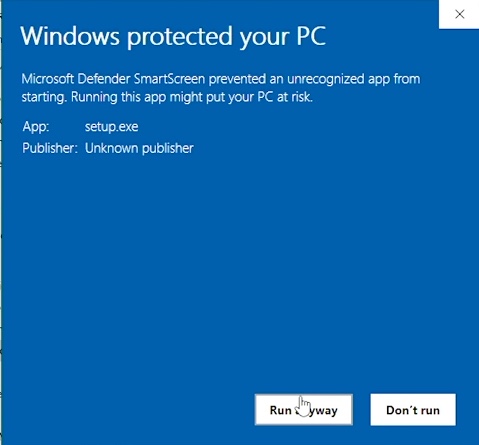
Part of the drivers with setup will give you SmartScreen, but you can get around that and install
Part you can get through Windows Update

Reach to me on Twitter if you think more detailed tutorial on installing drivers is needed, or have any details about missing drivers – because this one is already a bit long…
In the end, six drivers are missing with AMD I2C
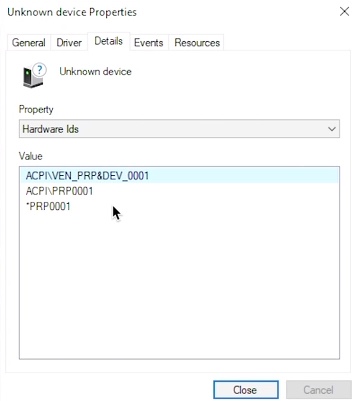
Your Windows installation will work fine, this is just something to explore more and see why the drivers are not provided from Valve or Microsoft through updates – Something I’ll investigate further. But don’t worry, this installation will be functional for you.
In the end, your Steam Deck will now boot every time into Windows, if you want to go back to SteamOS (I want) you will have to repeat Boot Manager procedure – volume down + power until you hear a beep
Enjoy your dual boot and happy gaming!!