Since Steam Deck is no ordinary console sooo… playing game on Steam Deck deserves it’s own guide. Steam Deck can be customized – per game, and although it can be overwhelming, it is also very rewarding experience – especially if you like to tinker with software and hardware.
Let’s see how to setup your game for gameplay.
If your are interested to know how to buy game on Steam – I have article for that.
I also wrote about installing game on Steam Deck here.
There is also my guide which covers all the menus under Steam button – you can find it here
And at last, article we will need in here – Configure Steam Deck Performance Options – be sure to go through it and understand what it does before going further here.
Now, before we press play, we will go through two menus we have on a startup game menu.
1.Controller Settings
Let’s press on icon inside green square with number 1 on above screenshot. You will need to this for most of the game you’ll play on Steam Deck. Layout is a specific to every game – and because you will often play older games optimized for PC, you will need to tinker with your controller layout for every game. Also Controller Layout and Settings are personal thing, what I like, you may not like – so, really no best practice here, test out, and see what fits both you as a person, and your gamestyle. Let’s start from the top.
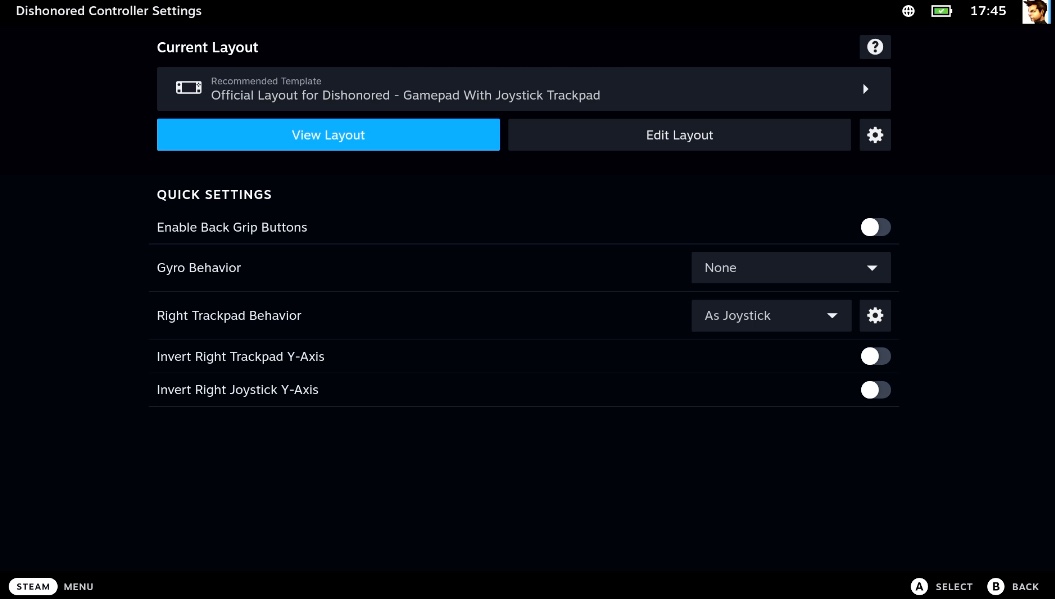
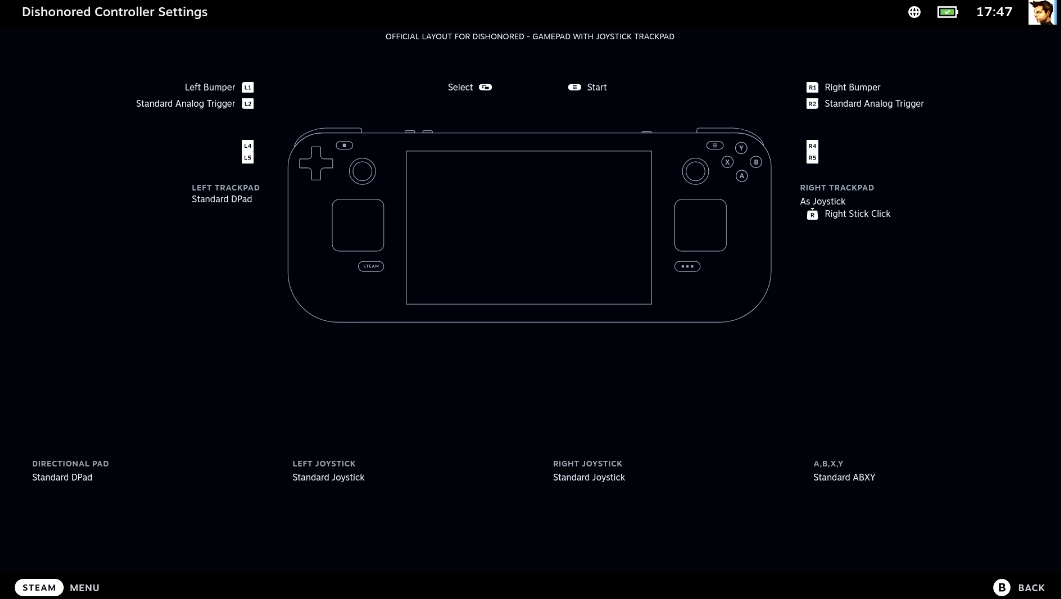
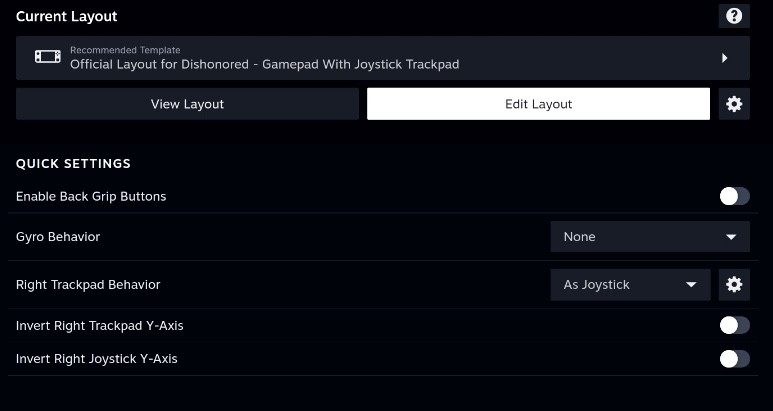
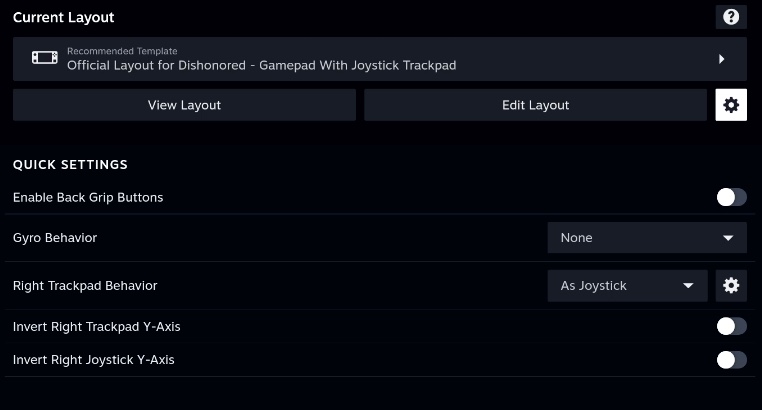
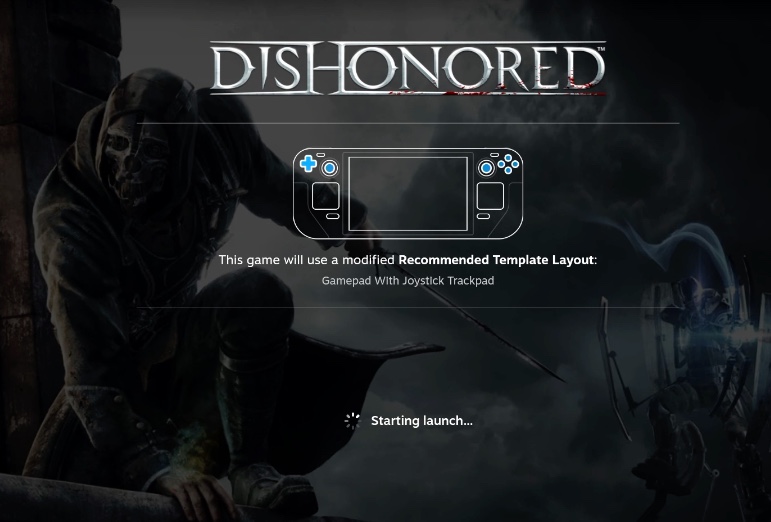
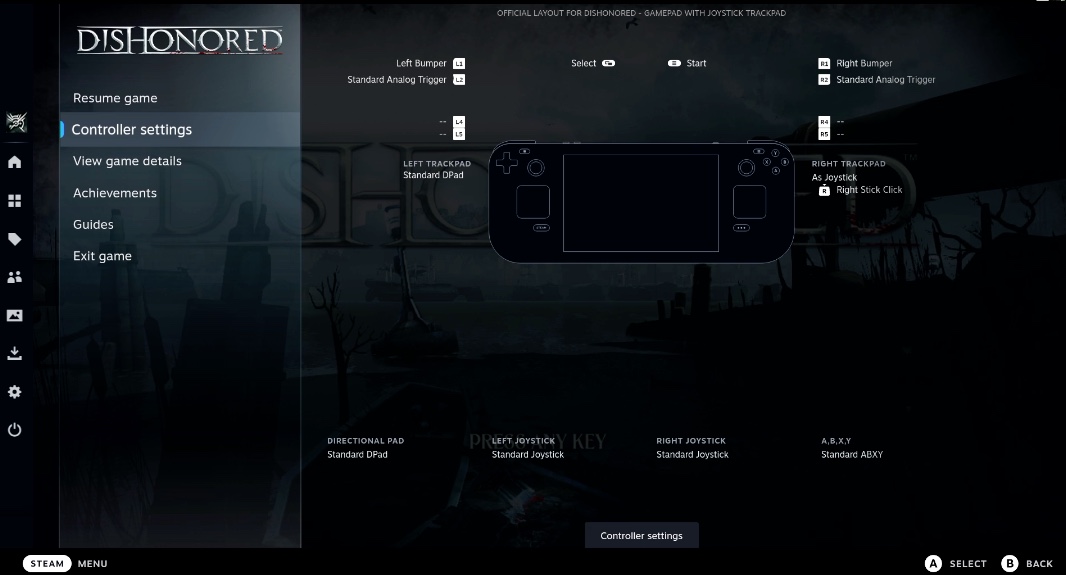
Current Layout – Official Layout for Dishonored – Gamepad With Joystick Trackpad is selected. If we click on the View Layout button below – we will see how the layout looks like.
If we don’t like it, we can go back up and select current layout – “Official Layout for Dishonored – Gamepad With Joystick Trackpad” and press A button to Load New Layout

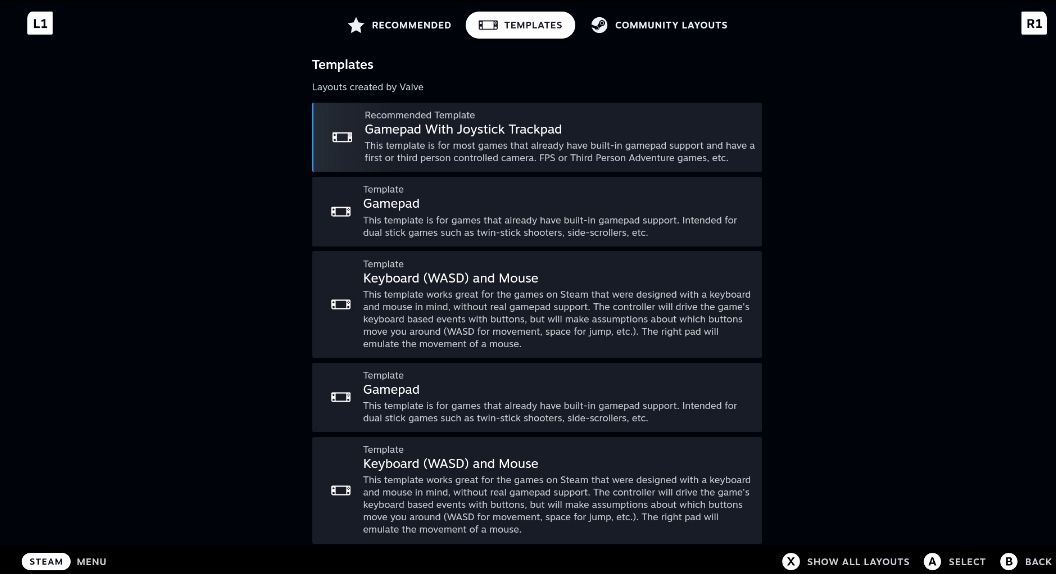
We can select between three tabs – Recommended | Templates | Community Layout – or press X to show all layouts. So, if you know that some custom layout is great for a game – you can find it here and use it for a game. You are of course free to switch between layouts and test what fits you best. We will now go back to main Controller Settings screen.
We will leave our current template – “Official Layout for Dishonored – Gamepad With Joystick Trackpad” but we will now press Edit Layout button below field with our selected template
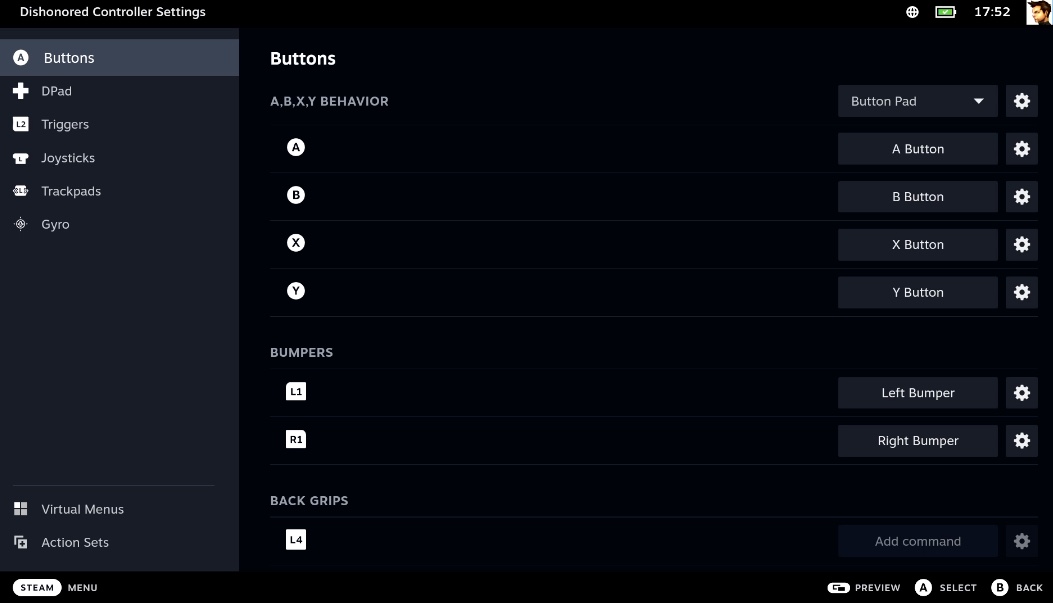
On Edit Layout screen you can customize everything – Buttons, DPad, Triggers, Joysticks, Trackpads, Gyro…
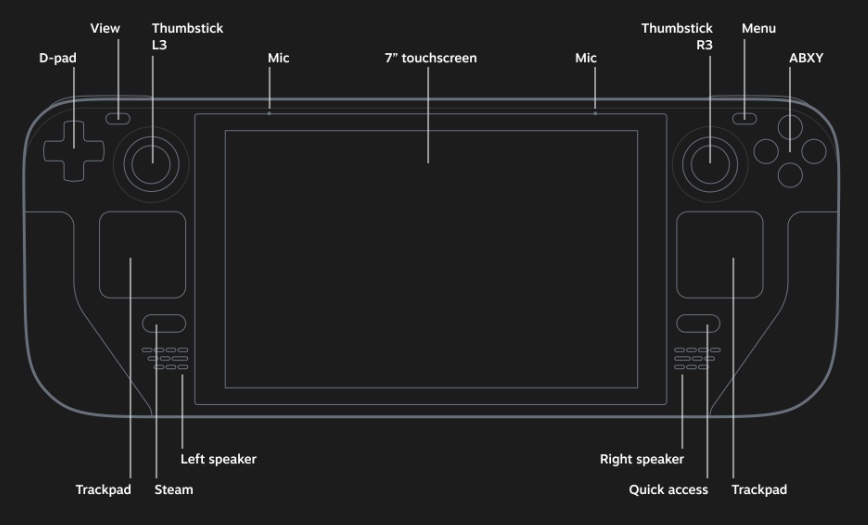
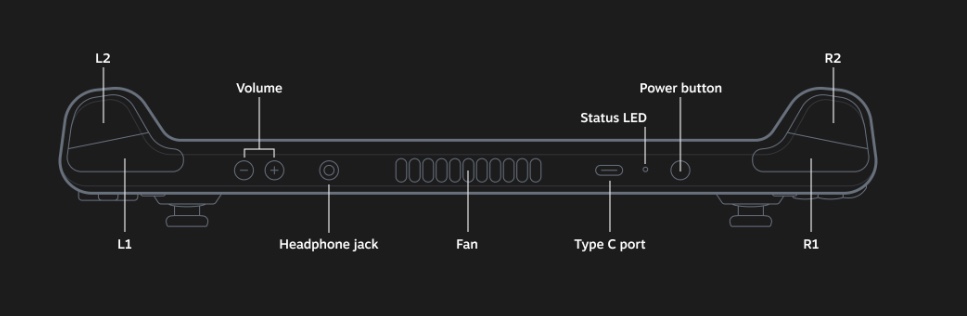
I will here c/p entire Steam Deck Button Layout from official Steam site – original content can be found here
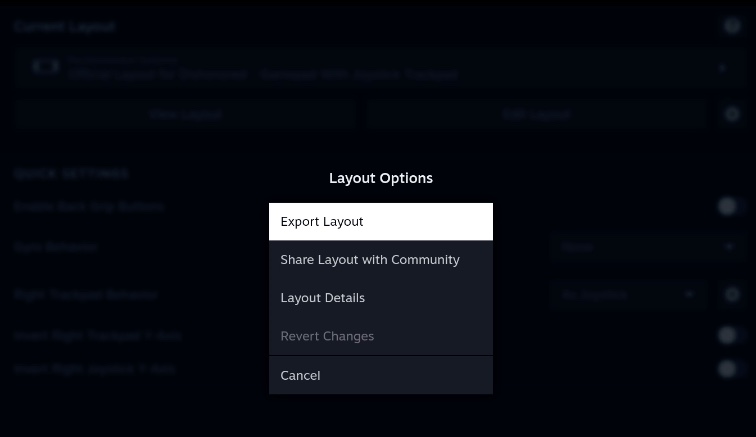
Now, let’s get back to main Controller Settings screen and select little cog (Layout Options) besides Edit Layout button.
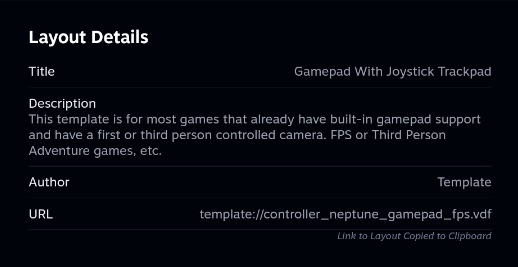
Under Layout Options – you can Export your custom Layout, you can share it, and you can see layout details
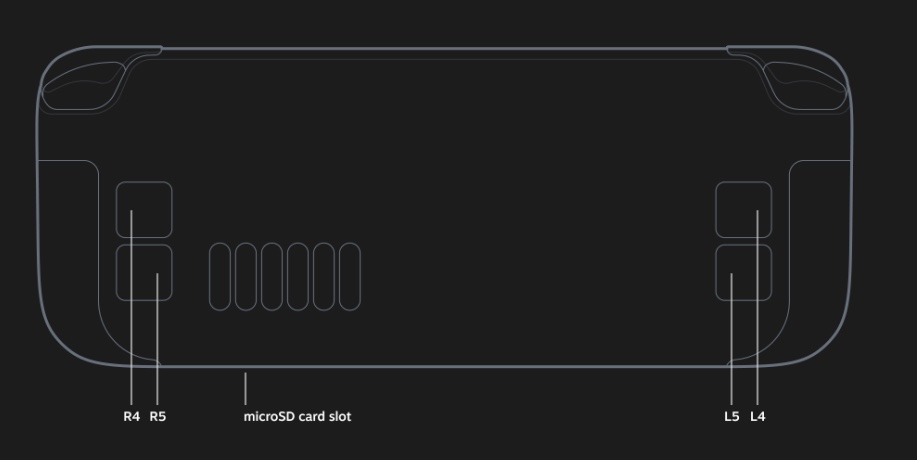
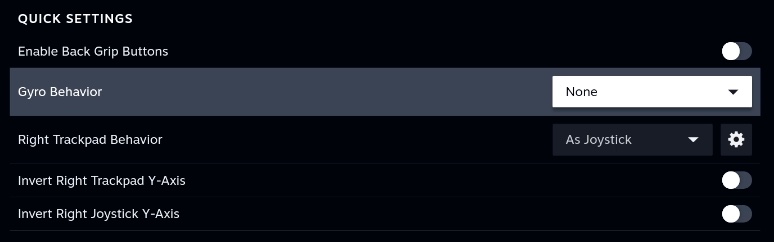
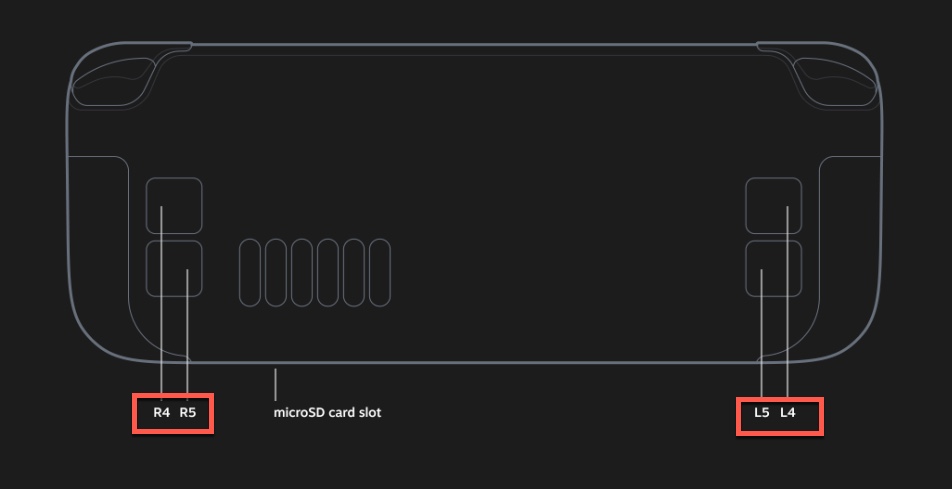
Under Quick Settings you can enable Back Grip buttons (R4, R5 and L4 L5) set Gyro behaviour, Invert Trackpad and Joystick Y Axis…
Here is location of back grip buttons
2. Cog menu – game specific menu
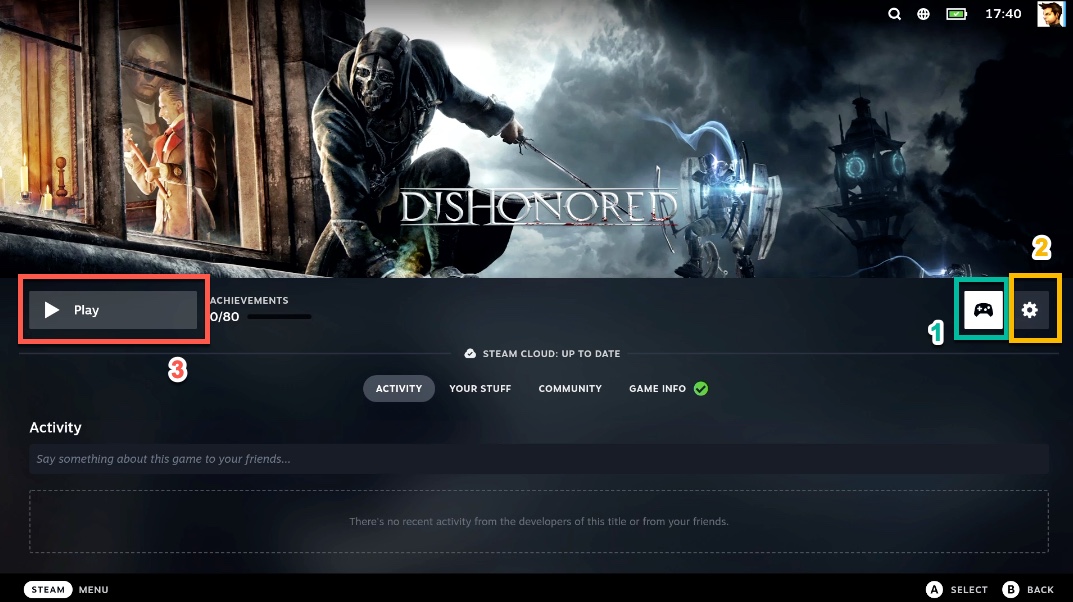
Now, on the main game screen we will click on number 2 menu – cog inside yellow square – that’s how I marked it on a picture above.
We already went through that menu in my installation guide – How to install a game on Steam Deck but there are two things I would like you to take a notice
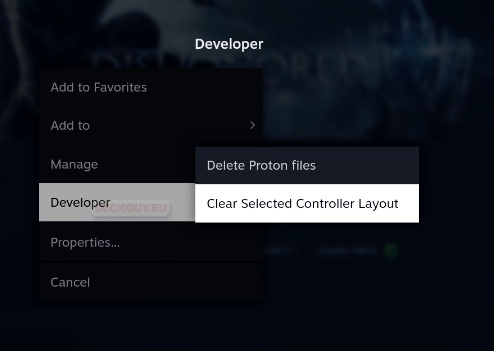
Under Developer menu – there is option to “Clear Selected Controller Layout” – so maybe it is useful in some scenarios.
Also, under Properties there is now a Local Files submenu in which you can Move install folder… (from internal storage ot SD card…) and verify integrity of game files…

Now, let’s go to number 3 finally – Play
3. Play
We are back at the main Dishonored game screen – and we will now select option in red square under number 3 – Play

We are notified about our Joystick Template Layout while installation of additional Microsoft components is going on.
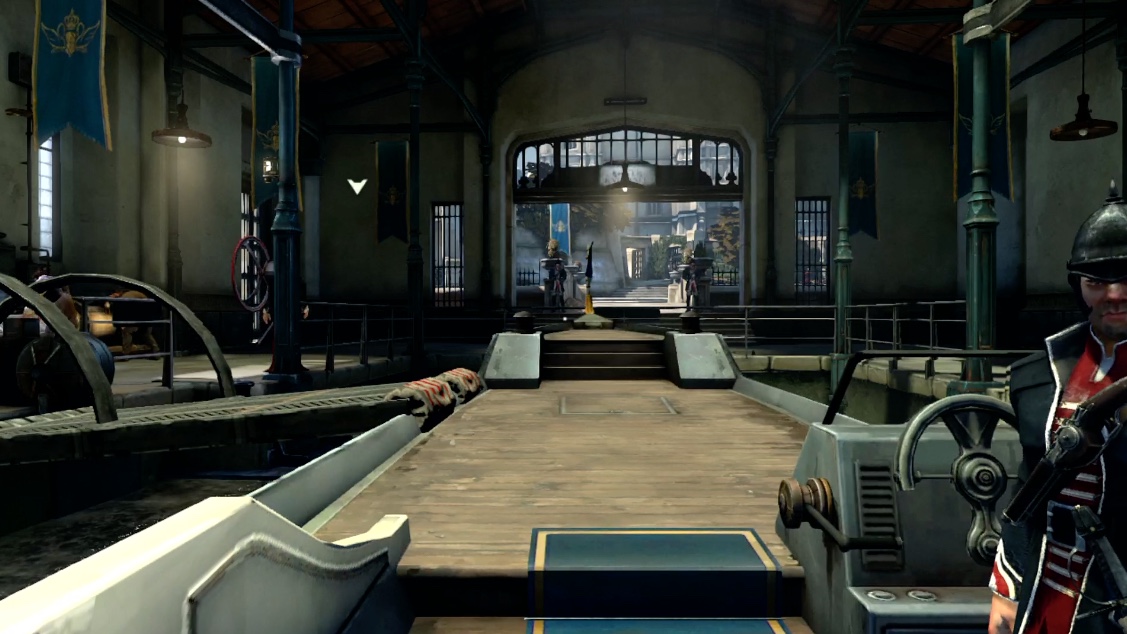
And we are on the first in-game screen – so far the game works.

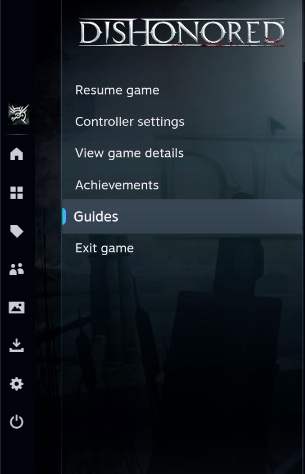
If we now press Steam button on our Steam Deck we will get following overlay with couple of menus
First one is Controller settings – we can see our controller definitions here. Also, at the bottom of the screen there is Controller settings button, which if selected will take you to Controller Settings, we went through already here at point 1.
View game details is next one that will take us to the main Dishonored game screen where we can go through elements of the game ( I already covered that in How to install game on Steam Deck)
We’ll just click on Resume
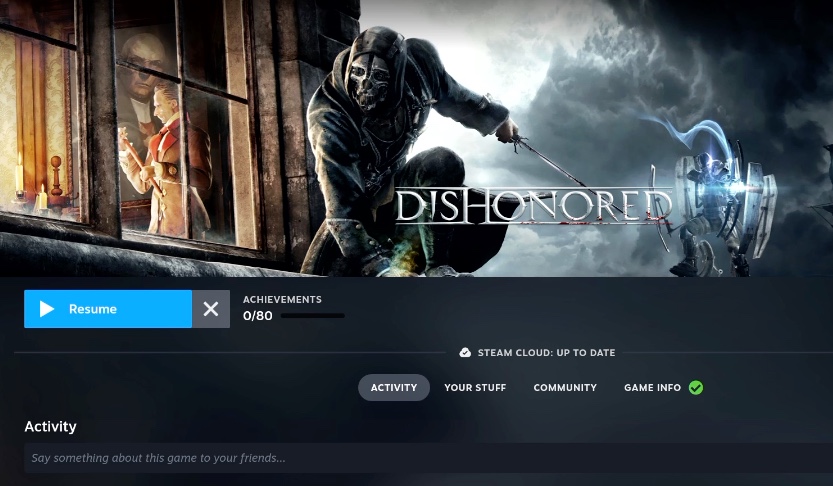
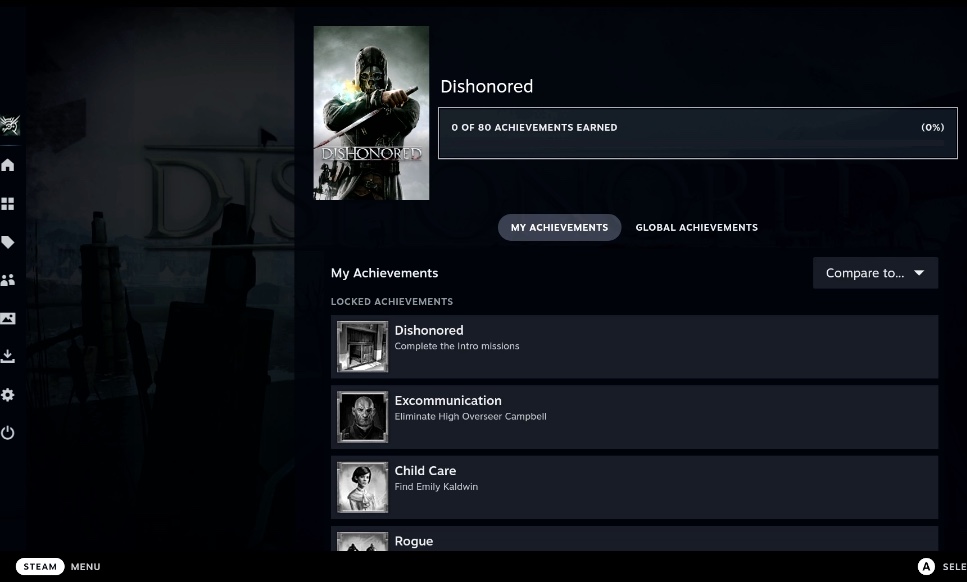
Achievements – will show you your game achievements
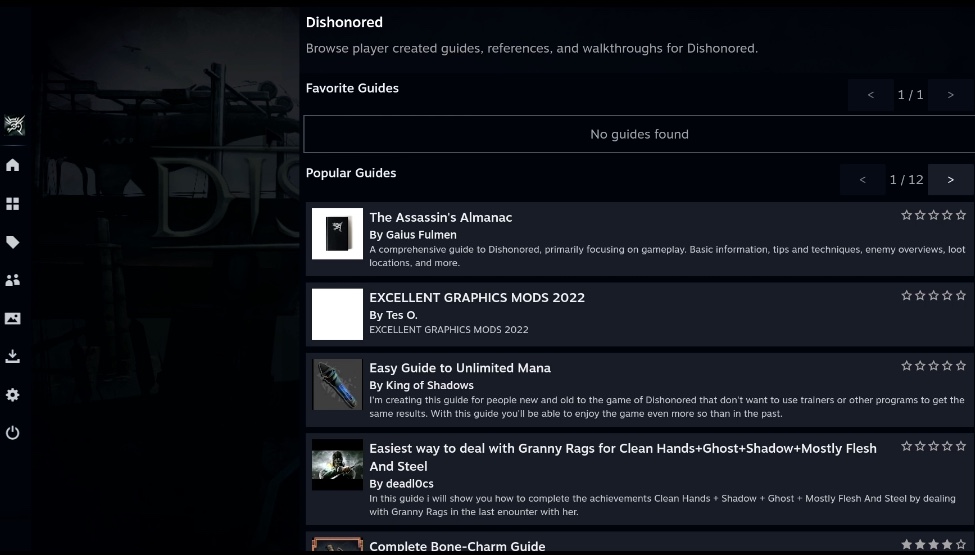
Guides – will take you to the various game guides, references and walkthroughs…
Exit game – is last one and I won’t use it now. If possible always exit through in game menu
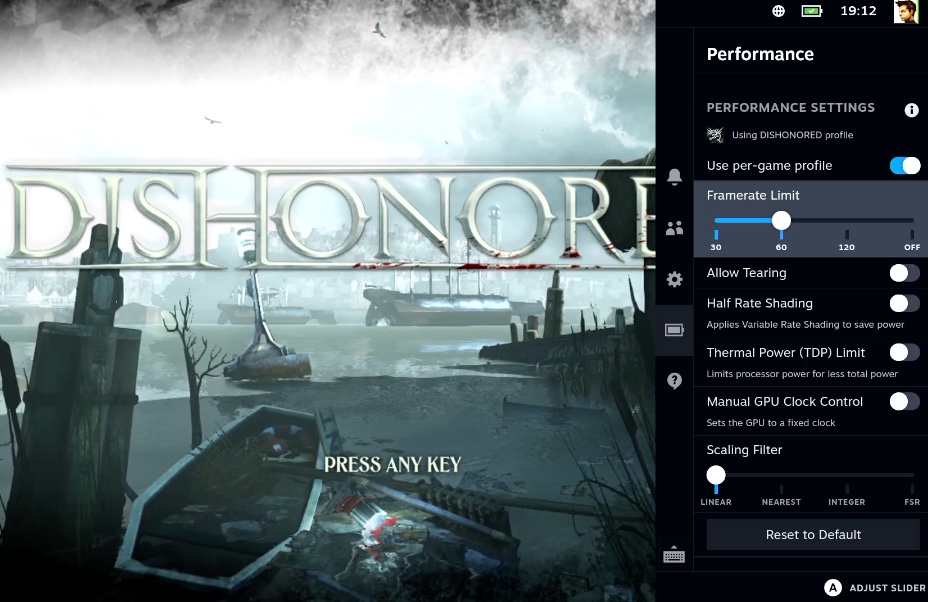
We will now press Quick actions button (…) to see what is in there hiding.
Performance is very important menu I strongly advise you to try on every game – to optimize performance and battery life. Use per-game profile in Performance, and play with sliders to get best results that you like in performance, noise, heat and battery aspect.
I have extensive guide on it already written here – be sure to check it out.
I will not go through details of every option here, since that is guide for itself on the link above, with detailed descriptions of every option.
You can go back to main game menu.
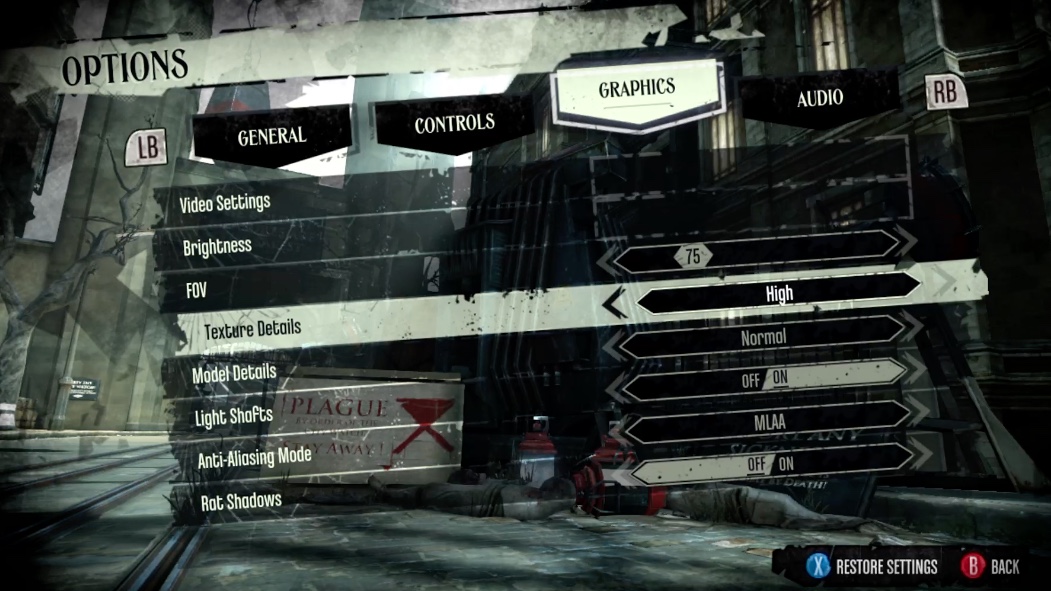
Before we start a new game – go to game Options (and that is worth for every game)

Go through Graphics details od the game – set details, texture levels, AA and so on, and so on. Start with lower settings – see how game performs – you can start Performance Overlay in game, and track FPS, CPU, GPU and battery levels, and then fine tune your experience.
When you are done with all of that – congrats – we can now start new game and play 🙂
Enjoy!